Showing posts with label published. Show all posts

Thursday, July 23, 2015

Some exciting news :-)


This post will be quite hectic, but I start travelling again tomorrow, and still have a lot of things to do before leaving. It was just too long without writing :-).

First of all
- that piece from the previous post - "Natura abhorret a vacuo" - actually won that competition it was made for. I am really happy, especially that I got the most wonderful prize - some free classes in Wytwórnia Antidotum jewellery making school! I will "collect" my prize this Autumn - I am super excited. I am sure this will be very beneficial for me.


Second of all
(or maybe I should have made it "first of all", because I am just over the Moon about it ;-) ) my piece "Startled" was published on the cover of "Handmade Business", issue August 2015. You can even find a  post about its making here, on my blog :-). It was such a great surprise. Inside there is also a wonderful article about metal clays, written by Jeannette Froese LeBlanc.


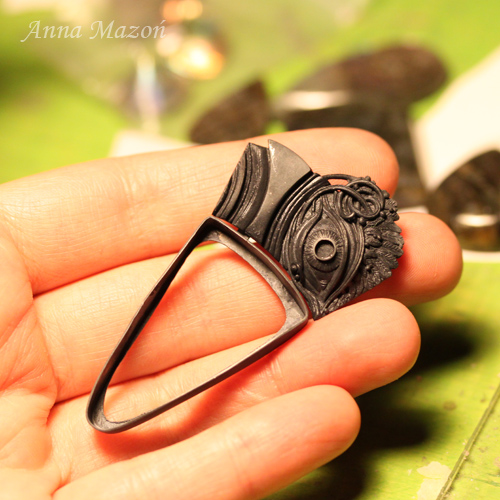
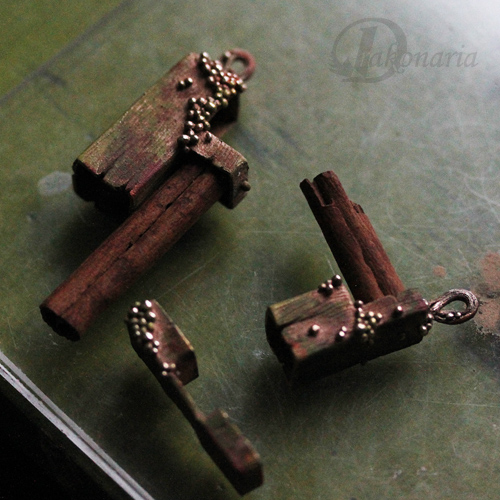
Third of all (I wonder if this expression goes beyond this number ;-) ) I started  an exciting journey with preparing pieces for my permanent collection, using lost wax casting method. Finally! I was thinking about it for a year or more. I found a very reasonable caster, made a few models using metal clay and they made the molds. For that first time I prepared a flowery pendant, three of my twig rings, and some tiny items meant mostly for stud earrings. I was quite impressed with the result. Of course there were some issues, but the caster is willing to work on the molds a little bit more, to make sure they work perfectly.It actually seemed that they had a little bit of fun too, because they hadn't worked with this type of design before.


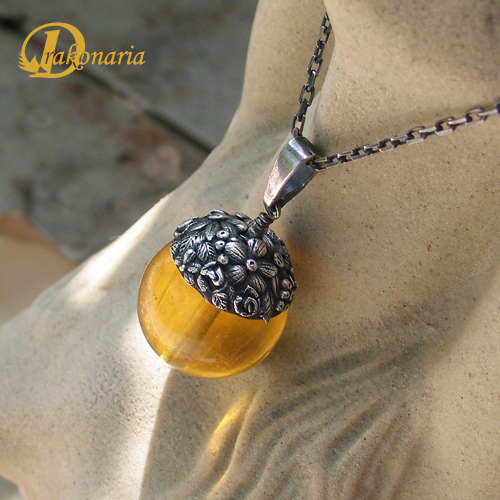
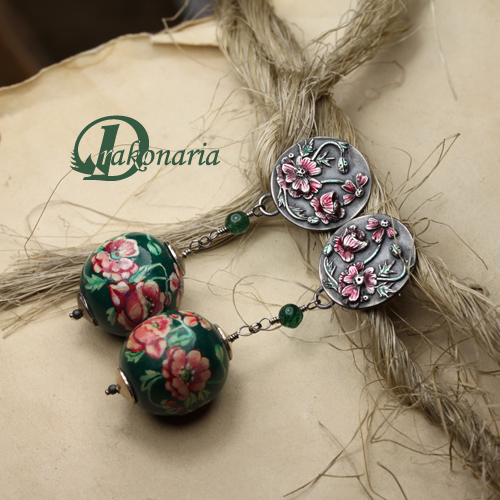
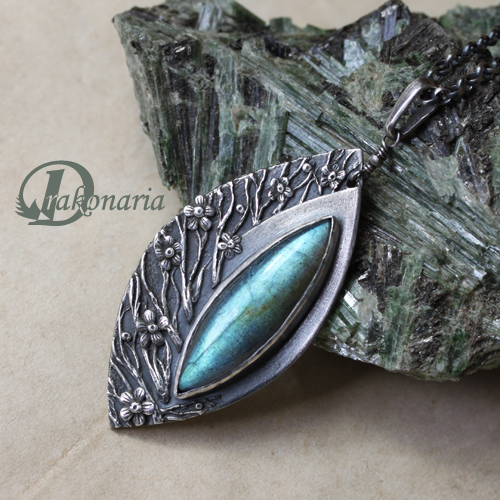
It's a long story, and I will surely write a separate post about it. For now I am just showing you photos of two of my casted pieces. In the pendant above  I left the place for the stone without a setting, so it can vary in size, type etc. and I can make each piece unique in a way :-). And the earrings are actually super tiny :-). I learned so much through this experience, and this is another thing I will continue this Autumn, when I come back. I have a lot of doubts and various thoughts about the whole idea. I am also preparing a presentation about the whole process for Metal Clay Mojo retreat in Chester CT - I will show some interesting things on example of a tiny owl, which started as a metal clay prototype


Conferences, classes and stuff ;-).
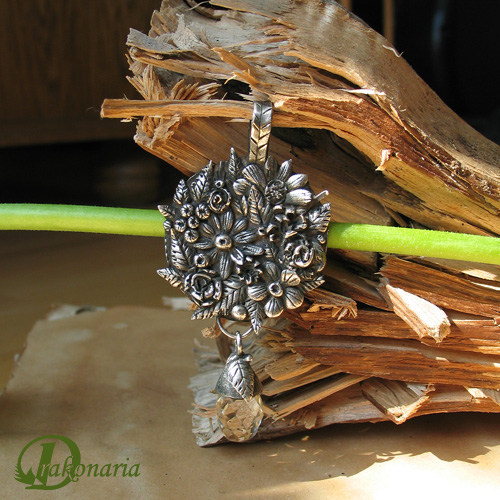
Another exciting thing are all the journeys which start tomorrow. First I go to Japan - mostly for vacation, but I will also visit Aida Chemical Industries' studio in Tokio. I will have there a little presentation of my work. So - if you just happen to be in Tokio on August the 10th - let me know, I will give you some details :-). Of course I am very stressed :-) - my whole jewellery making life I have somewhere in my head, this little voice,  whispering "when they (whoever they are at a moment) see my work in person, they all will think - 'yeah... we thought it was better'" :-). Having this meeting in mind I made a few new pieces with Art Clay Silver - this tree among them. It's a good example of one of the techniques I use. Of course I am freaking out about the finish, "askewness" etc. but I try to think that all my jewellery is Nature inspired, and you know what? There is no such thing as "perfection" in Nature. At least if we define perfection in our weird, human way.


Classes
- Yes. When I come back from Japan, I will have four days to prepare for my trip to USA. In one of the previous posts I wrote about my schedule of classes there. I will visit three states - Connecticut, Pennsylvania and Illinois. I am hoping to see some familiar faces and meet new people :-). I will teach my "Herbarium pendant" class in all the studios I visit. When I come back, I will fly to UK, to teach in Metal Clay Ltd. And then I'll be back for good :-). I also prepared quite a lot of things made of PMC Sterling and other materials, to be able to show some new work, wherever I go.


Ok, so I guess that's all. I am just leaving a few more pictures of  my recent work, and come back to packing!

Sunday, November 30, 2014

I see you ;-) "Startled"

Recently I've been trying to downsize my stash of cabochones, at least a little bit. I solemnly pledged not to buy any new stones, but use what I already have (a TON :-D ). Since then I go over all my stones daily, and each time I find something that is particularly inspiring at the moment.

The thing is, that over the years my work became more sculptural, and usually the focus is on metal, not on the stones. I discovered that it was not so easy for me anymore to design something that features a stone, which is relatively big. I think, automatically, about huge forms, because I feel that there have to be a lot of additional stuff around the stone - I feel that the stone is just not enough.
Yeah. I know - when I said this to myself for the first time I realised right away how stupid this is. So, I decided to push myself a little bit out of my comfort zone, and from time to time focus on the stone and let it lead me wherever it wants. This part is particularly hard for me - I am such a control freak... Anyway - this is one of these projects.


When this cabochon of agate caught my attention I immediately felt very strongly about its pattern and its "energy" (no, I don't mean Capricorn-New Moon-red candle&black cat type of energy ;-) ). I mean that it was timid - those muted hues of purple - so not into your face - but very dynamic at the same time, like something that stares at you from behind the bushes and suddenly realizes that you see it too. Then there is a sudden outburst of movement, UP! UP! To the sky, where you can't reach it.
ekhm...
....
:-)


You can see in the picture above, that I scultpted and carved the upper part of the pendant is silver metal clay. The hardest part was leaving this smooth, raised area - I hate empty spaces ;-). But it just had to be there.

After firing I formed bezels for the stones - big one for the agate and tiny one for a small amethyst.


Then I soldered the smaller bezel...


... and cut out of a silver sheet a shape that became a backing plate for the main stone, and the bail at the same time. I soldered the bigger bezel onto this piece of sheet, then formed c-shaped bails and soldered the whole piece onto the back of sculptural part of my pendant.
It's so dark, because I took this photo after oxidizing and before finishing.


And here is how the front looked like after all the soldering, oxidizing, but before finishing and stone setting.

I called this piece "Spłoszenie" in Polish... I am not sure if this is the best translation possible, but I guess that "Startled" would be the closest thing.


Finished piece looks like this. Of course I am not fully happy with it, I wish some angles (especially the "wing") were a little bit different, but I was really happy with the process itself.  It was different than usually. No sketches, more like "listening" and waiting what comes next. I really enjoyed that.

Ok, and just to share some exciting recent news ;-)
- An interview with me and Christi Anderson, as the winners of "Saul Bell Design Award" 2014, metal clay category, was published on "The Studio" (Rio Grande's blog).
Here you can find the whole interview.
- An article about my newly started collection, "Slavic Tales", was published on "Meet the Slavs" - website devoted to Slavic culture, history and mythology. You can find it here.
Wohoooo and that's it for today ;-).


Thursday, February 14, 2013

Riveting - after workshops in Warsaw :)

 The workshops in Wytwórnia Antidotum jewellery making school were really great :). Quite surprisingly, the most interesting thing I learned there was riveting. Well, I generally knew how does it work, but I've never tried it before and it's always about details, not "general knowledge" ;). Here is what I did - pure work of art, isn't it? ;)))))))))). Thanks to this utterly ugly piece I practiced two types of rivets - "normal" ones and stilt rivets.

I also saw a lot of scary, huge machines ;). I mean professional jewellery making equipment :). I was really startled by the fact that these things are usually so specialized... I saw special tool for cutting pieces of tubing (!!!), special tool for making dome shaped pieces of metal sheet, special tool for cutting circles (seriously? :))))... If I wanted to have fully equipped, traditional workshop I would need another apartment to put all these things there. Yes. I know. It usually works exactly this way. I'm simply quite an anti-tool person. I usually have as few things as possible. Generally my hands are my best tool. I guess it only shows how unprofessional I am ;).


But of course I'm really happy I was there, learned a lot of new things and met great people (huge thanks to the teacher of our group - Remigiusz Grodzicki). It was a wonderful experience and I wanted to try my newly acquired skills as soon as I came back to Cracow. And here is what came out of it. It's a ring with hidden rivets.

This enamelled "bowl" part with sculpted flowers is made of silver clay, and band plus stone setting is made of regular silver sheet.
Below you can see how I made it.


First of all I made this element out of Art Clay Silver. This was also the first time I worked with "the new formula" which recently hit the market. I got a package from my wonderful supplier - Planetart. Honestly I'm a bit dissapointed. Yes - this new formula is softer, has great workability, longer working time, is a bit more like polymer clay or a bubble gum ;) etc. etc., but for me Art Clay Silver became second PMC. And I don't like this. I really liked to be able to choose. Art Clay was better for filing, but worse for carving and PMC quite the opposite. Now there are two brands of silver clay that are great for carving, but non of them is good for filing. The silver lining is that I recently really like to work with PMC3 (which isn't available in Poland) and now I won't have to buy it abroad. Art Clay will do just fine. But enough about the clay.

As you can see, the piece in the photo is already fired. I made two holes for future rivets before firing and used wet packing technique to put white enamel on its surface.

And here is the piece after firing enamel and oxidizing. I also tried another new thing here. I found on Vickie Hallmark's blog an information that it is possible to use a pencil to create sketches on enamelled surface. It really works and I love it! It was the first time I tried it, so it isn't exactly what I intended, but I will definitely practice this technique.


Then I made an irregular band out of silver sheet and drilled two matching holes in it. Why two and not just one? I wasn't so sure about my riveting skills, and I was afraid my ring would spin. So I decided to make two rivets instead of one, to constrain potential movement.
Then, also using silver sheet, I made a bezel cup with corresponding holes in its base...


...and riveted the hole thing :). Fortunately it turned out nothing was moving and my rivets were very tight.


Finally I set a stone (it's a citrine - with faceted front and flat back), made some finishing and the ring was ready :).
I'm totally in love with white enamel. There is something so pure and magical about it. It is simply inviting to "spoil" it ;). With a sketch, with a drop of colour... Just like a blank piece o paper :).

Ok, enough for today. Ah, and one more thing. If you want to read some more of my blabbing ;) check the latest newsletter of Metal Clay Academy. I was honoured to be chosen as a Featured Artist there. I'm really happy about this :).

Friday, January 25, 2013

Something nice, something interesting, something weird ;)

First of all our jewellery auctions for The Great Orchestra of Christmas Charity were very successful :). We collected almost 19 000 PLN (which is over 6000 USD). And The Orchestra, during The Grand Finale, collected in the whole country almost 40 millions PLN (which is about 13 millions USD :) ). It was great to be a part of this. So this is "something nice" :).

The "something interesting" is my article in the latest issue of Metal Clay Artist Magazine (well, I hope it is interesting ;) ). Some time ago I made this dragon pendant with a moonstone as a custom order and took a lot of photos of the whole making process. I decided it would be nice to write something about this. Originally I showed it only to the girls from Etsy Metal Clay Team, but Joy Funnell told me it would be a good material for an article. Thanks Joy! :) So here it is :). If you haven't read this MCAM issue yet, check it out. There is a lot of interesting things in there. My personal favourites are Michael Sturlin's article on time management, Wanaree Tanner's "how to" on sterling silver clay ring and an interview with Evelyn Pelati Dombkowski.


And as for "something weird" - this is a longer story ;). A few weeks ago I was invited to a free metalsmithing jewellery workshops organized by Wytwórnia Antidotum (jewellery making school based in Warsaw). I chose a class on casting and it will take place this weekend (can't wait!), but the fun began sooner ;). The official invitation I got by mail was everything but ordinary.
As you can see in the photo, it was a lovely wooden box, with a few weird things inside: a piece of aluminium mesh, a circle made of plexiglass, a cinnamon stick, playing card and a glass cabochon. There was also an instruction saying that I should choose at least two of these things, add anything I want and make this way a wearable piece of jewellery :). Just for fun!

I immediately had a few ideas, but finally I drew this and decided to use the cinnamon stick and aluminium mesh. The cinnamon stick because I liked it the most from the very beginning and the mesh, because it was so ugly I just felt I needed to do something to make it easier on eyes ;D. This project was totally not "me", but I just wanted to have some fun, so why not? :)


I chose to work with Goldie Bronze ™, simply because it's relatively cheap (so I wouldn't feel remorse that I'm wasting materials just to play) and I needed something warm-coloured for that project.
I constructed  a few cuboids, that I planned to put together in three segments that would form three parts of the pendant. I wanted them to be rather rough and slightly irregular.
Later I removed excessive clay with a file, added some texture and granulation. I also chipped them a bit...


After firing and some finishing they looked like this. I decided I would try something new for finishing touches and finally test Vintaj Patinas I bought some time ago. I used three colours - moss, cinnabar and rust. I used them for the first time, so I didn't do it really "professionally", but I guess I can say something about this product. Generally I like these patinas, but to be honest I wouldn't call them patinas. These are just cool semi-opaque paints for metal, that stick really well to its surface, are water resistant and generally durable. They look really nice and I already can see that it is possible to create very interesting effects with them, but this never will be a real patina look. They don't react with metal, they just cover it, so the look always will be different. But I still like them very much! I just wouldn't call them Vintaj Patinas, but Vintaj Metal Paints :).


Then I began assembling the whole thing. I cut the cinnamon stick into two pieces (I used a piercing saw for this) and put them in the right places (yes, I used epoxy glue for this, and yes, I'm very ashamed of this ;) ).


I needed two more cuboids I planned to make of aluminium mesh, but finally I decided I would also use the playing card from the wooden box. As you can see I just folded it and scotch taped it from the inside. Later I made the same shape from the alumium mesh.


And here you can see the finished pendant. I used Vintaj Patinas again on paper and mesh cuboids.  I painted the inner surface of the mesh with "rust" and the outer with "moss". It looks quite interesting when you can see orange colour peeking out from behind the green. I applied the same colours on the surface of the playing card cuboid. I just irregularly layered them one on top of another. When patinas dried I covered them additionally with glossy decoupage lacquer to make the cardboard cuboid more durable and harder.

So here it is :). I would never make something like this normally, but I have to say I had a lot of fun, I learned a lot and I got inspired! I will definitely make something else with cinnamon sticks (this time something more consistent with my aestethics ;) ). This is a wonderful material. Its texture and colour is so beautiful and the smell is heavenly :).

Wednesday, January 9, 2013

Saul Bell Design Award Competition and flowerology ;)

 I wanted to wait with this till the photos of finalist pieces are published, but the names were announced a while ago and the photos still aren't there... And my wonderful news is definitely not fresh anymore ;)... So...

I'm SO proud and happy to announce that my "Flower Storm" bangle is one of the five finalists in Saul Bell Design Award Competition (metal clay category). This is a huge thing for me :). I'm also very thrilled and honoured to be a finalist among wonderfully talented people I like, admire and respect - Wanaree TannerLiz Hall (both from Etsy Metal Clay Team! :) ), Cindy Silas and Christi Anderson. Seriously girls, I feel like an ugly duckling :). Whatever the final result is - I'm already happy!

This piece is a part of my latest "Twigs" collection. I came up with it when I was working for the first time with Goldie Bronze. It also features flowery ornamentation - very dear to me. I love and make a lot of different types of ornaments, but flowers were the first :). I know it's quite typical, but I can't help it - I think that majority of jewellery makers have a little romance with flowers at some point. Let me show you a short (well, not so short ;D ) photo story of my flowery romance ;). It begins with this very first flowery medallion I've ever made :).