Thursday, August 27, 2015

Visit in Aida Chemical Industries

This time I will start my post by saying "Hello from USA" :-), specifically from New York. I got here yesterday, after the most fantastic metal clay conference - Metal Clay Mojo Retreat, which took place in Chester CT (photo by courtesy of Paddy Marcotte). I was teaching there two classes and making a few presentations (I will write about the whole conference experience later). But to make things even more interesting ;-) today I want to "come back" to my recent trip to Japan and write a little bit about my visit in Aida Chemical Industries - the producer of Art Clay Silver, Gold and Copper.


I went to Japan mostly for vacation, but at the end of our stay in this beautiful country I had an amazing opportunity to actually visit Art Clay Studio in Fuchū, Tokyo. I was invited to show my jewellery and talk about my work during a meeting with Japanese artists and instructors (you can find a blogpost in Japanese on Art Clay blog here - lots of nice photos :-) ). I also did a little demo showing my technique of working with coils.


I was so greateful for such a warm, wonderful welcome, interesting conversations, smiles and good energy. It was also very exciting to meet all the artists whose pieces I saw so many times, published in various publications, to learn about cultural differences and  how they influence our designs. I wanted to say THANK YOU once again also for all these fantastic, unexpected gifts. They will be a beautiful reminder of that day.


After "Meet the artist" part of the day I went to see Aida Chemical Industries' refinery. Such an interesting place! I learnt about the process of reclaiming silver and gold from x-ray images, electronic circuit boards and dental gold&silver scrap.

I also played a little bit with 20 kg silver ingot (which basically I couldn't lift in any way, so my great guides found a smaller one for me to pose with ;-) ). In the photo you can see yet another ingot - gold one (oh, that shine! :-) ). Then, if you are able to take your eyes away from the shiny stuff, you might notice that in this photo there are also two people ;-). Me and fantastic Daisuke Minagawa.

I would like to thank him once more for taking care of me during my visit in Aida and Art Clay studio, organising everything, and being such a warm, welcoming person. I also want to say thank you to Mark Atkinson for all his help during our stay in Japan!


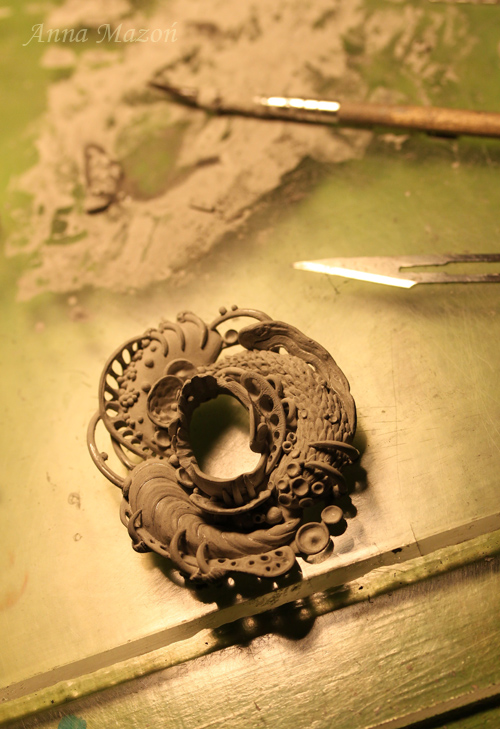
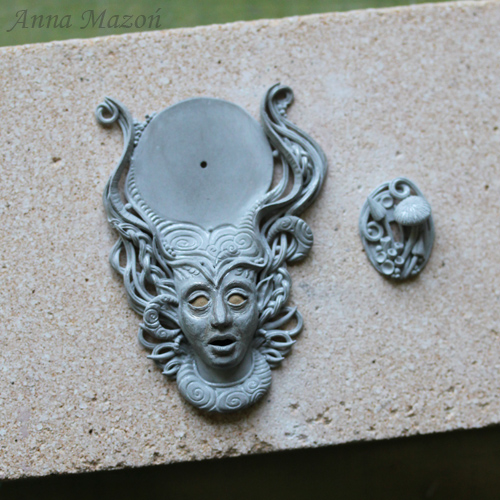
And this is one of my favourite photos I took during our trip to Japan. Hopefully, when I come back to Poland, to my own little studio, I will have time to work on some new pieces inspired by our trip. We saw so many different, amazing things. I already know that I want to come back there one day. Those 2-3 weeks was definitely not enough time to see and appreciate everything...

Thursday, July 23, 2015

Some exciting news :-)


This post will be quite hectic, but I start travelling again tomorrow, and still have a lot of things to do before leaving. It was just too long without writing :-).

First of all
- that piece from the previous post - "Natura abhorret a vacuo" - actually won that competition it was made for. I am really happy, especially that I got the most wonderful prize - some free classes in Wytwórnia Antidotum jewellery making school! I will "collect" my prize this Autumn - I am super excited. I am sure this will be very beneficial for me.


Second of all
(or maybe I should have made it "first of all", because I am just over the Moon about it ;-) ) my piece "Startled" was published on the cover of "Handmade Business", issue August 2015. You can even find a  post about its making here, on my blog :-). It was such a great surprise. Inside there is also a wonderful article about metal clays, written by Jeannette Froese LeBlanc.


Third of all (I wonder if this expression goes beyond this number ;-) ) I started  an exciting journey with preparing pieces for my permanent collection, using lost wax casting method. Finally! I was thinking about it for a year or more. I found a very reasonable caster, made a few models using metal clay and they made the molds. For that first time I prepared a flowery pendant, three of my twig rings, and some tiny items meant mostly for stud earrings. I was quite impressed with the result. Of course there were some issues, but the caster is willing to work on the molds a little bit more, to make sure they work perfectly.It actually seemed that they had a little bit of fun too, because they hadn't worked with this type of design before.


It's a long story, and I will surely write a separate post about it. For now I am just showing you photos of two of my casted pieces. In the pendant above  I left the place for the stone without a setting, so it can vary in size, type etc. and I can make each piece unique in a way :-). And the earrings are actually super tiny :-). I learned so much through this experience, and this is another thing I will continue this Autumn, when I come back. I have a lot of doubts and various thoughts about the whole idea. I am also preparing a presentation about the whole process for Metal Clay Mojo retreat in Chester CT - I will show some interesting things on example of a tiny owl, which started as a metal clay prototype


Conferences, classes and stuff ;-).
Another exciting thing are all the journeys which start tomorrow. First I go to Japan - mostly for vacation, but I will also visit Aida Chemical Industries' studio in Tokio. I will have there a little presentation of my work. So - if you just happen to be in Tokio on August the 10th - let me know, I will give you some details :-). Of course I am very stressed :-) - my whole jewellery making life I have somewhere in my head, this little voice,  whispering "when they (whoever they are at a moment) see my work in person, they all will think - 'yeah... we thought it was better'" :-). Having this meeting in mind I made a few new pieces with Art Clay Silver - this tree among them. It's a good example of one of the techniques I use. Of course I am freaking out about the finish, "askewness" etc. but I try to think that all my jewellery is Nature inspired, and you know what? There is no such thing as "perfection" in Nature. At least if we define perfection in our weird, human way.


Classes
- Yes. When I come back from Japan, I will have four days to prepare for my trip to USA. In one of the previous posts I wrote about my schedule of classes there. I will visit three states - Connecticut, Pennsylvania and Illinois. I am hoping to see some familiar faces and meet new people :-). I will teach my "Herbarium pendant" class in all the studios I visit. When I come back, I will fly to UK, to teach in Metal Clay Ltd. And then I'll be back for good :-). I also prepared quite a lot of things made of PMC Sterling and other materials, to be able to show some new work, wherever I go.


Ok, so I guess that's all. I am just leaving a few more pictures of  my recent work, and come back to packing!

Saturday, June 6, 2015

Natura abhorret a vacuo


This piece, called "Nature abhors vacuum", was made for a competition organized by one of Polish jewellery making schools. The theme was vacuum/emptiness (Polish word "pustka" actually can be interpreted in a lot of ways). It felt really inspiring and it made me think about the idea that vacuum is like the priciest jewel - so rare, with a life so short - immediately "destroyed" by Nature. I wanted to catch this feeling of temporariness, constant movement, that hostility and greediness of Nature. Beautiful, but blind, thus scary. And this little jewel of emptiness, in the very centre, just for a blink of an eye. When I look at it, it also makes me think that sometimes emptiness is even more precious, because it's a reminder of something that was there. And filling this empty space, which is inevitable, is like loosing something again. So why not to freeze that moment - even if only like this.


This piece feels quite sad  actually, on some level it's simply about death, or maybe I am just in a little bit dark place right now. Anyway, funny feeling - I think it's the very first piece in my life I am truly in peace with. I am deliberately not saying "happy with". It's a different feeling. I just wouldn't change anything.


Enough of serious talking ;-). Let me show you a few photos I took while making this pendant. First, as usually, I made a sketch which later led me through the whole process. My sketches are not super detailed. I just want to catch a feeling, general idea etc. I just need to know what I meant.


I wanted the pendant to have a lot of volume, to create really sculptural look, but obviously, because I decided to work with silver (PMC Sterling in this case) I didn't want to use too much of the material. That's why main elements are openwork or empty inside. By the way - I took this photo also because I liked the way how I accidentally positioned these three "worms" - it made me think about an idea for another piece.


I attached my three, empty "worms" to the backgroud and started working on building the whole composition, details etc. It's not so clearly visible in this photo, because there is only a slight difference in colour, but sometimes, when I want to see how something will look like, I make it from polymer clay first, and place it where I want it to go (these three fangs), just to test the idea. Sometimes it's convenient to put an element made of wet clay in the right place quite quickly, while it's still elastic. That's why it's nice to know beforehand what I really want to do with it ;-).


First textures and some new elements... And of course my very favourite tool - scalpel blade. No, the flowers are for something different ;-).


Some carving, slip painting, drilling, filing, forming wet clay... I just use whatever technique I need to use, to get the look I want.


More and more details. I wanted to create totally different textures on each element, to get this feeling of abundance in Nature. But I didn't want to end up with any kind of a sweet-cute-Nature-flowers&peace look, rather something more primordial, predacious, but still with this kind of a flow which makes you think of an inward movement.


Then I moved to the center of the composition. I thought about colonisation, uncontrolled growth, Nature filling every possible space. And the thing is that I even don't mean Nature only in terms of biology and the Earth. Do you know how difficult it is to find perfect vacuum? Well, it's actually impossible. This is how rare this "gem" is.


And here is the pendant ready for firing. Because it was made of  PMC Sterling, and I still have some problems with distortion in case of rings, I was afraid that something so complex might change its shape really badly in firing. I took a piece of ceramic paper and cut out an opening inside it, so when I placed the pendant on it, the bail fitted into the opening (and to the carbon beneath paper) and the pendant lied perfectly flat. I also stuck little bits of ceramic fiber inside empty elements and supported some raised parts that could droop. Stainless steel mesh cage went on top, to prevent pieces of activated carbon from getting in between parts of my pendant. Then of course more activated carbon, and the whole thing went into the kiln. It sounds more complicated than it was ;-).


Honestly I was even a little bit surprised how well it fired. There was no distortion at all. At least I didn't see anything aparent - the "flow" was still there. I was super happy when I saw it. Then some oxidation and finishing, and it was done. This time it was pure metal clay technique piece. Nothing else.


So, here are a few more photos :-). The results of the competition weren't announced yet, but honestly, this was just an excuse to make this piece. I guess this is what all competitions are about ;-).

Thursday, April 23, 2015

Emperor Sun - on a learning curve :-)

Here I am again, trying to learn a little bit of traditional metalsmithing skills and thinking how to marry them with metal clay :-). I really enjoy acquiring new knowledge and challenging myself. Recently, when I taught in Germany I took with me a book written by Andrzej Bandkowski, entitled (loose translation - the book is in Polish) "A class of making artistic jewellery". It's not really a "class", you won't find any real tutorials there either. It's rather a quite personal take on basics of jewellery making with a ton of great tips and tricks. In my spare time I read the book, and what I especially liked, were all kinds of box-like constructions. So this time I wanted to try building something more 3 dimensional out of sterling sheet, train multiple soldering and sawing.


Sooo... Once upon a time ;-) I sculpted this tiny sun, using fine silver clay. I fired it, and left it for later. I even made a mould of it, which I rarely do, and added bronze versions to a few pieces, but the original little sculpture still wasn't used.


Finally I chose a stone and made a rough sketch of a general idea, slightly inspired by Art Deco (As if you could see anything in this sketch ;-)).
I didn't want to do anything too complicated.


Then I made more detailed templates, and glued them on a piece of sterling silver sheet. Note to self - really, really, you should buy a printer and start using vector art programs again (or a protractor, compasses, ruler etc. YAY! I loved geometric contructions at school ^^). Sketching freehand, in case of something that is not "organic" or super "flowy"doesn't lead to anything good. All the irregularities and inaccuracy started here. If you don't have a precise template for sawing, your sawing won't be precise. Yup, learning on mistakes again.

Anyway - I used what I sketched, marked places where I wanted to drill holes with a center punch and drilled them.


And here are my two elements after sawing and some cleaning. It's the first time I tried to saw elements that weren't "organic", but a little bit more geometrical and I have to say that it's so much more difficult than sawing swirls, waves , leaves and other pretty things ;-) (you can see under the links some examples of my other sawing attempts).


Then I started building the boxes. I measured circumference of the round element and cut a strip of sheet to form a circle that had a  diameter and height I needed (more or less... next time I will REALLY measure things). I soldered two ends of the circle together, and then soldered it onto my round element. I also cut two more strips to form a crescent-like shape - the walls of the other element.

You can see in the photo that the strips are of different width. If I used a proper tool to make sure that they are equally wide I would definitely save some time... ;-) But, yeah, no... Learning. I am just too impatient and excited when I try something new. I just cut them freehand.


I formed a crescent shape out of the strips (it was quite difficult to get the same curve - I just used my hands and forming pliers - maybe there is an easier way... Again - coming back to the beginning - if my crescent shape was really made of two nice archs, I could simply use ring mandrel to get the right curve on the strips...). Then I  filed the ends of the strips (I needed the places where they met, to be pointy, so they weren't visible from under the open work crescent shape), soldered them together and then soldered them onto the shape itself. I also found somewhere (you never know what you can find in your workshop one day ;-) ) twisted, decorative wire, and decided that this might be a nice touch to the whole look of my pendant, so I added it to both elements.

In case you're wondering why silver is so clean - I just took all the photos after pickling - otherwise everyhing would be covered with a ton of flux residue.


Now my boxes needed bottoms, and my stone needed a bezel cup. I formed a bezel, soldered it onto a piece of sheet, and cut out the inside. The stone has a nice back, so I wanted to show it, but my cunning plan ;-) was also to use this piece of sheet from the inside, for the bottom of the round element. Of course, because I judged it by eye, it turned out to be too small, so I had to find another piece of sterling to cut out the circle... Seriously... (facepalm ;-) ) Measure, measure! It's not metal clay where I can take a little bit more and roll it out again.


Before the last soldering I also filed/drilled a few holes in the walls, to make it possible to join the two parts of the pendant and to be able to string it somehow later. Then with an easy solder I soldered the crescent shape on top of the part with the bezel cup. In case of the round part, first I applied some solder on the back of my metal clay sun, flattened it on sanding paper, placed it in the right position, and then at the same time I soldered the round shape onto the circle and sweat soldered the sun on top of the box.

When I made sure that everything is really soldered I cut/file off spare silver from the edges and made sure they looked seamless.


I set the stone, made some finishing, and it was ready :-). You can see the back in the other photo below. I have to say that making this piece was a great lesson.... of cursing in all languages I know :-D. Just joking (yeah ;-) ).

Sunday, April 19, 2015

Some news :-)


Ok, so I guess it's time to say that I am so happy and proud to announce that I am a finalist in Saul Bell Design Award competition again :-). This time with a necklace. Thank you very much!


This necklace is called "Midsummer night" and was inspired by a celebration of the shortest night of the year in Slavic culture - Kupala Night. It's a festival of fire, water, joy, fertility and love. People gather around bonfires to dance and maidens plait flower wreaths, which are later thrown into rivers or lakes to tell the future or to be caught be a beloved man. It is said to be dangerous to swim though, because especially during this magical night you might encounter rusalkas - female water spirits. If they saw handsome men, they would fascinate them with songs and dancing, mesmerize them, then lead them away to the river bottom to their death. You can see three of these water spirits in my necklace, peeking out of the lake, surrounded by water plants and fireflies.
The necklace is made of fine silver clay, 18K green gold clay, sterling silver, labradorites and silk.


It's the third time I am one of the five finalists in metal clay category in this competition. My first lucky entry was my "Flower storm" bracelet (SBDA 2013). It was one of my first pieces made with Goldie bronze, and right now it's owned by Goldie's creator - Waldo Iłowiecki :-).
My second finalist piece (SBDA 2014) was inspired by Slavic folklore. It was Leshy - keeper of the forest. At the end it placed second and I was lucky enough to attend the award ceremony in Albuquerque, and The Santa Fe Symposium, which was really very interesting and truly inspiring. The whole thing was a wonderful experience and I can recommend it to anyone :-).

So, this year, my "Midsummer Night" necklace is in the final five, but of course I won't tell you how it placed, yet :-). I don't want to ruin fun of guessing for anyone ;-). It's also very mysterious this year, with no announcement of the finalists.  Even I don't know who else is in the final five in my category - besides Janet Alexander with her wonderful "Mom's Jewelry Box", who already announced her achievement on her website. I always love looking at the finalist pieces - there is so much eye candy there every year :-).

EDIT :-) So now , a few more people decided to share their great news, so I can congratulate again Janet Alexander, but also Terry Kovalcik, Holly Gage and Ivy Solomon! I have to say that it's a huge pleasure to be a finalist with so talented and accomplished people.

Monday, April 6, 2015

Rendez-vous with PMC Sterling :-)


Yes, I know, I am behind everyone when comes to sterling silver clay :-). I guess it's simply because we don't have PMC distributor in Poland (anyone interested? ;-) ), so I rather stick to Art Clay. But last year when I got Rio Grande gift certificate for Saul Bell Design Award, I decided to spend it mostly on something that is not so easily accesible in my country, so PMC Sterling and Argentium :-). I already played with Argentium a little bit (fun!), but sterling clay was waiting and waiting... Finally I decided to try it.
Sooo, my plan for this post is to write a little bit about how did it go ;-).


Generally - I like the texture of this clay when it's wet - it's super fine,  quite similar to PMC3 - a little bit like a bubble gum :-) (if compared to Art Clay). Long working time, darker colour than fine silver clay - blablabla everyone already knows these things -  a lot of really great tests were published in various places.
What surprised me was how dried clay behaves. This material is undoubtedly designed for carving, and I don't really carve. I file. So at the beginning I was super annoyed by the fact that this clay, even when it's dried, is a little bit "buttery" and it clogs files immediately. So, in a way, I was forced to change my way of working, especially for this clay, but you know what - at the end I don't mind it. I learned a lot.


Another thing that I don't like is high shrinkage rate - I really don't need my pieces to become smaller. I can live with 10% of fine silver clays, but 20% is a little bit too much. And it comes with a price ;-) - bigger distortion. It turns out that it's not a problem in case of more or less flat pieces (all the pendants were ok), but in case of rings it is an issue. I had to reshape all the rings that I made so far, to make them round again after firing. I'll have to try firing plugs, but I don't like using additional stuff in firing process.


Yeah - as for the additional stuff - after a few first firings that left some carbon marks on backs of my pieces I learned (thank you Terry Kovalcik and Ros Wood! :-) ) that it's better to arrange firing in such a way that pieces don't have any direct contact with carbon - so cover them with a stainless steel mesh or something like that. With those first pieces I also tested soldering traditional sterling to fired PMC Sterling, and it works ok.


It seems that yes, this clay has its cons - no doubts about that -but the strength - it makes up for everything, and that's the reason why it's definitely not the last time I am using it. I want to use it more, especially for rings, but first I have to solve the distortion problem.

Here is another example of PMC Sterling work, mixed with sterling sheet and wire (the stone setting, bail behind it etc.) - "Dream Keeper". I cut sterling sheet in a shape which fitted exactly in between the ornaments on the back of the pendant, so it was easy to solder it. Then I soldered prongs on top of it and a bail on the back. It worked nicely.


If you are curious, here you can see a few steps of making my "Drawing down the Moon" pendant (the first photo), inspired by a Full Moon ritual. Someone asked in one of the internet groups, where did I get the mould ;-))))))), so I just thought that it might be interesting to show the process at least partially.

Here you can see some progress of making the face. I work mostly in an additive way. Then I take away some clay in "strategic" places ;-) with a file. I don't use any fancy carving tools etc. People who attended my classes know that I have just two favourite tools - something for cutting and a pointy file - this would be all.

Some more details. I didn't do anything to the face from that point - I was quite happy with the expression. I am still learning how to sculpt human faces and there is still a long way to go, but I feel I am finally starting to think about expressions and not only "how to make a face that looks more or less like a face" ;-).

Details, details. It's like building a tiny model :-). Adding a little bit, filing off a little bit. It's not easy, and it's not fast, but I think it's worth it. I just love this complex, three dimensional look I can get this way.


And some more building and filing - the piece might look quite openwork and delicate, but you might notice that each element is attached to something, really firmly, at least in two places.


Almost ready. I just added a little bit of 18K green gold inside the eyes - I wanted to create this feeling of her being "filled" with the Moon, with this otherwordly shine in her eyes :-).
And it was ready for firing. It turns out that manufacturer's schedule works just fine in my kiln, so I fired all my PMC Sterling pieces in two phases - first open shelf 538 °C for 1 h, and then buried in carbon 815 °C. for 1-2 h (depending on the size of the piece). After getting some marks from carbon in my first firings I make sure that I have some ceramic paper under the piece and stainless steel mesh above it. I don't mind quite long firing time at all - especially if I work on a piece for a few days. But I understand that this might be annoying for people who make a lot of simpler pieces.

Because of the green gold addition, in this particular case I repeated the second phase of firing twice. According to the manufacturer (Michelle :-) ), it requires double firing. You can read more about this material here. And I guess that this would be all for today ;-).