Here you can see what you actually get. Two blue parts for making walls of your flash drive enclosure, pink mould for making plugs which help to keep both parts of the pendant from shrinking too much, white investment powder to make the plugs, a magnet (for a closure) and a USB flash drive.
On their website you can also find quite easy to follow, very detailed instruction, and even a few videos.
 The first part of the whole process is making the walls. You just have to roll out the clay into that big, blue mould. At this point, while the clay is still in there, you can add some textures - they will be visible on walls of your enclosure. Cool, but I'm really not into textures and I already knew that I wanted to make a sculptural piece, so I just left my walls smooth.
 At this point it is very important to follow the instructions about when to remove the walls from the mould, because it really makes a difference (walls fit better to each other). This is also the moment when you realise how much clay this project requires and you start regreting that you decided to make the very first test piece in silver ;-).

After cleaning edges of the walls (honestly this was tricky - I filed them a little bit too much and changed the angle of the edge, which originally was 45°...) you put them together, simply with a bit of paste. This blue cradle makes things much easier. First of all it helps with keeping 90° angle between the walls. You can also notice in the photo that inner surface of each wall has a lot of little holes (they are here to save some clay) and letters, which indicate what goes where - A to A, B to B etc. etc. It takes quite a lot of time to put the whole box together, because ideally after adding each wall you have to wait till the new joint dries.
If you applied some textures on the outer surface of the walls, watch out not to stain them with paste - I had quite a lot of paste on the other side of the seam.

On the side of the cradle, through a little "window", you can check if your walls really fit well together. I have to say I liked this detail.

Here you can see how my first assembled box looked like. It definitely wasn't perfect - the edges weren't super crisp - I had to file them a little bit. I also had to patch a few places with paste from the outside. If I applied a texture on the walls in the first step, this wouldn't be so easy. I would probably destroy the pattern a little bit with all that filing and adding paste.

Then I took out my magic wand, and I made my little elves work... HARD ;-). And here is what they made - my flash drive enclosure was almost ready for firing.
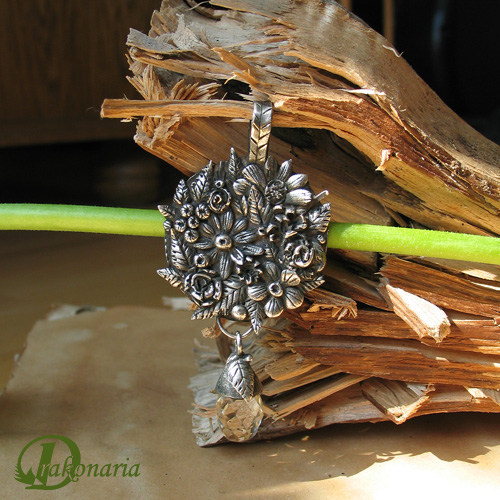
Being more serious - at this point you can embellish your box any way you want. My pendant was inspired by a Norse sea goddess - Rán. I just formed and carved each detail using two of my favourite tools - a scalpel blade and a round, pointy file.

There is one more thing you have to make before firing - the plugs. Just mix a little bit of that white powder with water and pour it into these pink moulds. Now I know that it's a good idea to do this BEFORE you even start working on your pendant. These plugs dry quite slowely and they have to be really dry before you put them inside both parts of the box.

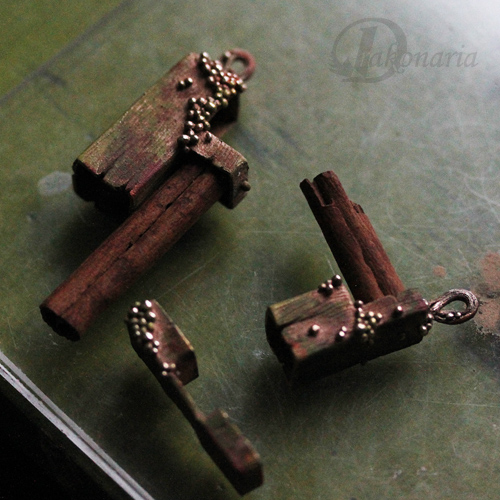
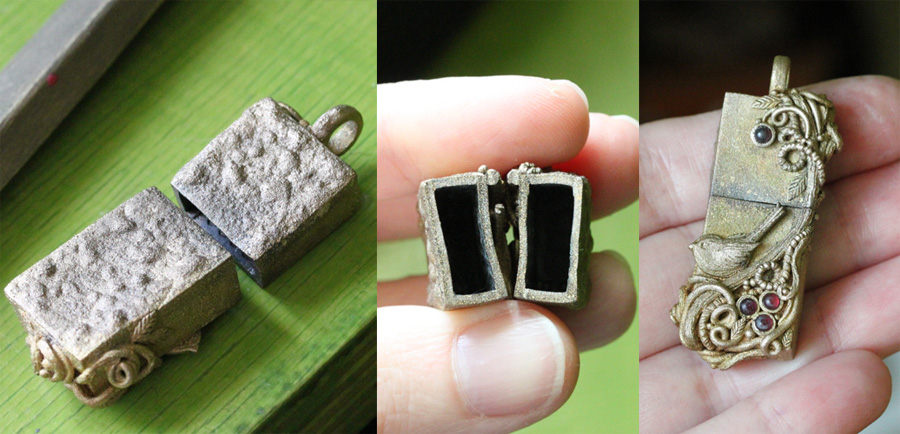
And here is my flash drive enclosure ready for firing with both plugs inside. You can see a part of the plug in the smaller piece. The second one is almost fully inside. Then I just followed my usual firing schedule for Art Clay Silver (full ramp to 800° C, hold for 2 h).
 After firing and some finishing the pendant looked like this. I was really happy with the final result BUT the thing is, that I had to do A LOT of post firing filing. The plugs didn't really prevent the clay from shrinking too much - the USB flash drive didn't fit in there at all. My theory is that the kit is rather meant for texture-type embellishment, and I added a lot of additional clay on my box. It's probably exactly as it is with rings - heavily embellished, sturdy rings seem to shrink a little bit more than thin, delicate ones. I'm also always aiming for the highest shrinkage possible with my firing schedule - I fire long and hot. It's just a habit connected to the fact, that a lot of my pieces are delicate and openwork, and I need the material to be strong. So - the kit worked ok, but some additional work was necesarry.
Later I decided to test the kit on a different clay. I got a few types of Noble Clay to try, and after one test firing (now I know I should have made more tests...) I decided to make something more serious than just a test strip. Following the instruction once again I made this flash drive enclosure. I have to say, that this time, with some experience from the first trial, it was faster, easier and the result was more precise.
 Imagine my disappointment when after firing I saw this... Actually at first I saw the top of my enclosure which was fine, but when I turned it over I saw all these blisters (back was originally flat and smooth). There was also a lot of distiortion. It was very interesting, that the top was ok, but the back was basically melted.
Again - I did a lot of filing, tried to make it straight again (which was super hard), and I left the back the way it was - I just polished it (funny thing is that the person who owns this pendant, actually said that this back looks very interesting ;-) - everything is a matter of taste ). Well - honestly I was quite annoyed, and I haven't used Noble Clay anymore from that moment :-))))))). One day I will - I still have a few packages, but I have to be in a right mood for further experimentation.

For my last experiment with that kit I used Goldie Bronze. The construction of the box was easy peasy this time - I already knew very well how to use this kit.
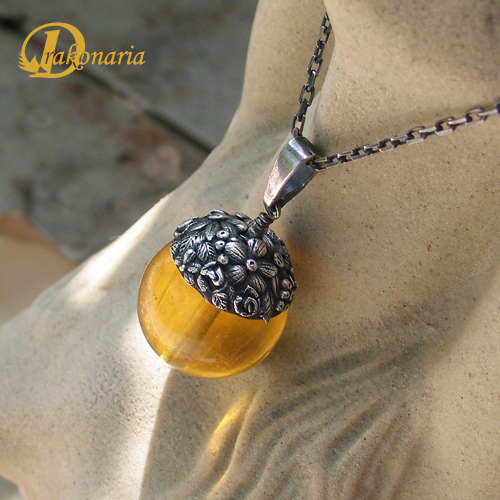
I added some intricate, sculptural ornamentation, and fired it the way I usually do (350° C on top of carbon for 1 h, and 825° C for 1 h with more carbon and closed lid).

This time everything went ok, and the flash drive fitted inside - I guess it's because Goldie has such a low shrinkage rate. So here it is ready. It was inspired by a visit in Josephine Wall gallery in Poole, last year.
Ok, so here are my general thoughts:
- Flash drive enclosure kit is definitely a smart tool.
- Follow instructions really carefully, otherwise it won't work precisely.
- If you fire to the highest shrinkage and /or add a lot of additional clay on top of the boxes, be prepared for a lot of post firing work. The flash drive probably won't fit inside (I guess in my case I should try with Art Clay Silver that version of the kit, that is meant for PMC, which has higher shrinkage rate).
- The price is high, so I guess I would rather recommend this kit for people who really plan to use it a lot. I saw some wonderful flash drive enclosure pendants, that were adorned mostly with texture sheets and didn't have any issues with too much shrinkage (Inge Verbruggen uses this kit very successfully).
- Yes, it makes things easier and faster, but of course you can construct this kind of a box without help of any kit. It's just about saving time, and not everyone is great with construction.
- Will I use it again? Probably yes. But only with Goldie. I spent too much time filing silver one, and next time I'll just construct the boxes my own way, and make my own calculations, to be sure that after firing everything will fit ok.