Friday, January 25, 2013

Something nice, something interesting, something weird ;)

First of all our jewellery auctions for The Great Orchestra of Christmas Charity were very successful :). We collected almost 19 000 PLN (which is over 6000 USD). And The Orchestra, during The Grand Finale, collected in the whole country almost 40 millions PLN (which is about 13 millions USD :) ). It was great to be a part of this. So this is "something nice" :).

The "something interesting" is my article in the latest issue of Metal Clay Artist Magazine (well, I hope it is interesting ;) ). Some time ago I made this dragon pendant with a moonstone as a custom order and took a lot of photos of the whole making process. I decided it would be nice to write something about this. Originally I showed it only to the girls from Etsy Metal Clay Team, but Joy Funnell told me it would be a good material for an article. Thanks Joy! :) So here it is :). If you haven't read this MCAM issue yet, check it out. There is a lot of interesting things in there. My personal favourites are Michael Sturlin's article on time management, Wanaree Tanner's "how to" on sterling silver clay ring and an interview with Evelyn Pelati Dombkowski.


And as for "something weird" - this is a longer story ;). A few weeks ago I was invited to a free metalsmithing jewellery workshops organized by Wytwórnia Antidotum (jewellery making school based in Warsaw). I chose a class on casting and it will take place this weekend (can't wait!), but the fun began sooner ;). The official invitation I got by mail was everything but ordinary.
As you can see in the photo, it was a lovely wooden box, with a few weird things inside: a piece of aluminium mesh, a circle made of plexiglass, a cinnamon stick, playing card and a glass cabochon. There was also an instruction saying that I should choose at least two of these things, add anything I want and make this way a wearable piece of jewellery :). Just for fun!

I immediately had a few ideas, but finally I drew this and decided to use the cinnamon stick and aluminium mesh. The cinnamon stick because I liked it the most from the very beginning and the mesh, because it was so ugly I just felt I needed to do something to make it easier on eyes ;D. This project was totally not "me", but I just wanted to have some fun, so why not? :)


I chose to work with Goldie Bronze ™, simply because it's relatively cheap (so I wouldn't feel remorse that I'm wasting materials just to play) and I needed something warm-coloured for that project.
I constructed  a few cuboids, that I planned to put together in three segments that would form three parts of the pendant. I wanted them to be rather rough and slightly irregular.
Later I removed excessive clay with a file, added some texture and granulation. I also chipped them a bit...


After firing and some finishing they looked like this. I decided I would try something new for finishing touches and finally test Vintaj Patinas I bought some time ago. I used three colours - moss, cinnabar and rust. I used them for the first time, so I didn't do it really "professionally", but I guess I can say something about this product. Generally I like these patinas, but to be honest I wouldn't call them patinas. These are just cool semi-opaque paints for metal, that stick really well to its surface, are water resistant and generally durable. They look really nice and I already can see that it is possible to create very interesting effects with them, but this never will be a real patina look. They don't react with metal, they just cover it, so the look always will be different. But I still like them very much! I just wouldn't call them Vintaj Patinas, but Vintaj Metal Paints :).
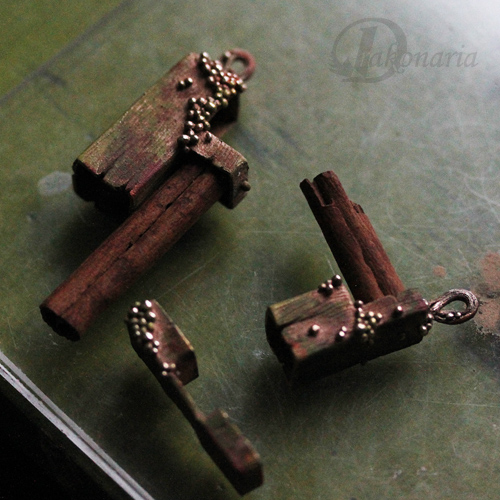

Then I began assembling the whole thing. I cut the cinnamon stick into two pieces (I used a piercing saw for this) and put them in the right places (yes, I used epoxy glue for this, and yes, I'm very ashamed of this ;) ).


I needed two more cuboids I planned to make of aluminium mesh, but finally I decided I would also use the playing card from the wooden box. As you can see I just folded it and scotch taped it from the inside. Later I made the same shape from the alumium mesh.


And here you can see the finished pendant. I used Vintaj Patinas again on paper and mesh cuboids.  I painted the inner surface of the mesh with "rust" and the outer with "moss". It looks quite interesting when you can see orange colour peeking out from behind the green. I applied the same colours on the surface of the playing card cuboid. I just irregularly layered them one on top of another. When patinas dried I covered them additionally with glossy decoupage lacquer to make the cardboard cuboid more durable and harder.

So here it is :). I would never make something like this normally, but I have to say I had a lot of fun, I learned a lot and I got inspired! I will definitely make something else with cinnamon sticks (this time something more consistent with my aestethics ;) ). This is a wonderful material. Its texture and colour is so beautiful and the smell is heavenly :).

Friday, January 11, 2013

Jewellery makers for The Great Orchestra of Christmas Charity

I'm generally very proud to be Polish. I love Polish culture, beautiful Polish language, Polish literature, Polish mountains, forests, cuisine (pierogi  *__* )... I could name forever ;). But this time of year I'm even more proud to be from Poland! It's because of The Great Orchestra of Christmas Charity.

Zapraszamy na aukcje Bizuteryjek dla WOŚP The Great Orchestra of Christmas Charity (GOCC, in Polish: Wielka Orkiestra Świątecznej Pomocy) is one of the biggest, non-governmental, non-profit, charity organizations in Poland. Its main objective is protecting health and saving children's lives by providing medical equipment to public hospitals. Every year (since 1993) milions of Poles donate to the GOCC volunteers from all around Poland, who are collecting money on the streets of almost every Polish city. Each year GOCC specialists choose different health issue, ask hospitals what they really need to deal with it, make analysis and then, after the money collection, they buy needed medical equipment. Simple and effective. Almost everyone in Poland knows someone who was treated in a hospital unit equipped fully or partially by The Great Orchestra of Christmas Charity. Such a beneficiary was for example my very own little niece :).

Collecting money on the streets is not the only way GOCC raises funds. Everyone helps in whatever way they can. Many companies help by giving their products and services, media offer free airtime, cities organize concerts, celebrities and ordinary people donate items to be auctioned off... The Great Orchestra of Christmas Charity triggers a lot of positive energy and extreme generosity.

A group of Polish jewellery makers also decided to help GOCC, by making a few extraordinary, collaborative projects. By "a group" I mean over 200 people! I'm seriously proud to be a part of such a creative, generous community. So take a look at these projects:


1. Charm bracelets.

A simple heart is a symbol of The Great Orchestra of Christmas Charity. That's why we made 23 unique charm bracelets to be auctioned off for GOCC. Each bracelet consists of beautiful, little heart-shaped charms, each one carefully crafted by a different person. All these wonderful hearts (almost 200!) were made with love! They are full of positive emotions and creative energy. As you can see in these photos, the hearts were made using many different techniques - soutache embroidery, traditional soldering, wire wrapping, metal clay technique and many others. These are just three of my personal favourites. To see other charms bracelets just check our auctions.


2. The second project was "The Wanderer".

It's a necklace that wandered from one wonderfully gifted woman to another, and in each studio it was embellished with amazing, handmade elements. This way The Wanderer covered a distance of 2700 km and thanks to 10 generous women it became hauntingly beautiful, silver necklace, adorned with lots of lovely natural gems. Look at this illustration of its journey. Amazing, isn't it? :)

Exactly two months before the Great Orchestra of Christmas Charity's Grand Finale a little silver heart started its journey across Poland. The idea was simple - The Wanderer was to be passed from person to person and each one of them was meant to add new silver elements.
And below you can see the whole necklace. And one more photo - my personal favourite - taken by Agnieszka Rzymek. The model is her daughter. As a newborn she was in neonatal intensive care unit in one of Cracow's hospitals - fully equipped by The Great Orchestra of Christmas Charity! :).


3. The third collaborative project is an unbelievably beautiful necklace - "The Rainbow" :).

This necklace was made by over 50 ladies (!!!) who use soutache embroidery technique. Each one of them made a single element and then all these elements were put together to form this hypnotizing, hand embroidered work of art. You can bid this necklace here.  And here you can find more info about it (in English).
As you can see in the photo, The Rainbow was made not only by many people, but also of various materials. The basic material are soutache cords, but they were adorned with lots of natural stones, pearls, zriconias, corals, beautiful glass, Swarovski crystals etc. All the highest quality.

The photo was taken by talented Arek Rząd and the model is Emilia Sierzputowska.


4. The fourth project was "The Copper".

"The Copper" is a lovely copper necklace made by four wonderful jewellery makers, brought together by the common goal of helping others. The necklace is adorned with natural rubies and pink corundum. Here you can read its whole story :).

You can bid all these wonderful pieces here. The bidding site has English version. All these auctions end 13th January, so there is still time. If, by any chance, you would like to bid, and have any language problems, just contact me. I'll help you gladly! :)


And here is my little input to this great initiative. Each one of these tiny hearts is now a part of a different charm bracelet. Did I mention I'm proud to be a part of such a wonderful community? Well, I really am :).
Thank you girls for this wonderful experience!

Wednesday, January 9, 2013

Saul Bell Design Award Competition and flowerology ;)

 I wanted to wait with this till the photos of finalist pieces are published, but the names were announced a while ago and the photos still aren't there... And my wonderful news is definitely not fresh anymore ;)... So...

I'm SO proud and happy to announce that my "Flower Storm" bangle is one of the five finalists in Saul Bell Design Award Competition (metal clay category). This is a huge thing for me :). I'm also very thrilled and honoured to be a finalist among wonderfully talented people I like, admire and respect - Wanaree TannerLiz Hall (both from Etsy Metal Clay Team! :) ), Cindy Silas and Christi Anderson. Seriously girls, I feel like an ugly duckling :). Whatever the final result is - I'm already happy!
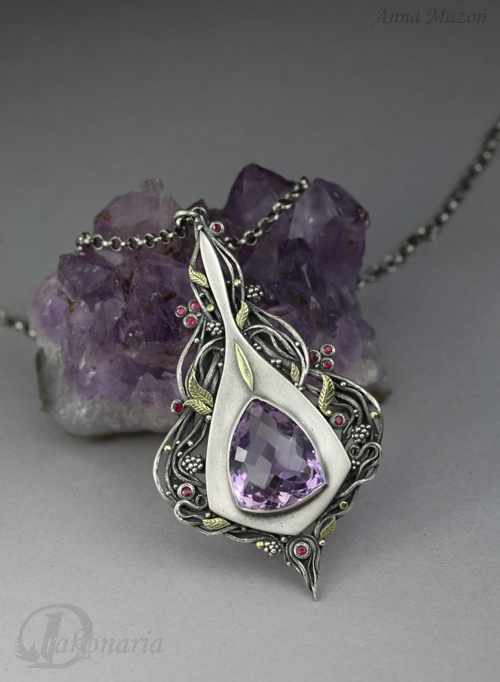
This piece is a part of my latest "Twigs" collection. I came up with it when I was working for the first time with Goldie Bronze. It also features flowery ornamentation - very dear to me. I love and make a lot of different types of ornaments, but flowers were the first :). I know it's quite typical, but I can't help it - I think that majority of jewellery makers have a little romance with flowers at some point. Let me show you a short (well, not so short ;D ) photo story of my flowery romance ;). It begins with this very first flowery medallion I've ever made :).


Saturday, November 24, 2012

Green gold - REALLY? WOOW!!!


This was my first reaction when Michelle Glaeser asked me if I wanted to try her green gold clay. Green gold? Really? WOOOW!!! Of course I wanted to try it! With all my leaves, flowers and other organic ornaments, this was a dream come true, so I was waiting for a package with this precious material like for a birthday party ;).

Generally, I have to say I'm VERY impressed by this clay, how easy it is to use and how dramatic the final effect is. In my opinion it is extremely beautiful and unusual way to embellish a piece.
Below you can find photos of three projects I made with addition of this clay, and notes on what I learned while making them. So let the story begin :).


I got from Michelle about 0.7 g of her 18 K green gold clay, which is a bit less than a half of a regular batch she sells. 0.7 g... Right. I was just hoping I would see this batch without a magnifying glass ;).
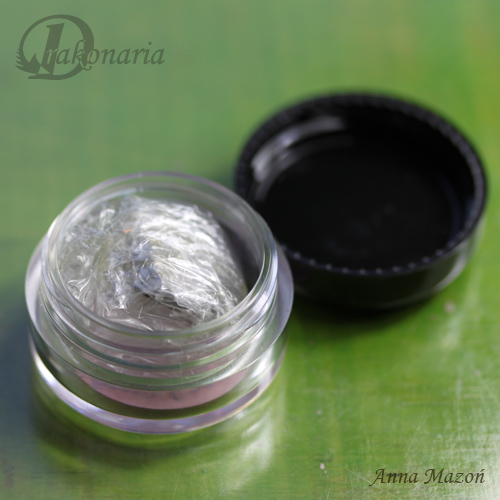
When the package arrived I opened it holding my breath ;) and  found this cute little jar, with clay wrapped in a kitchen plastic foil inside.


When I unwrapped the foil I immediately felt a smell of SO beautiful essential oils. Something like rose, sandalwood... Generally lovely, oriental fragrance. I'm looking at my notes, and I see I wrote down, that it smells like an India shop :). But it is seriously very pleasant and so unexpected. You get gold clay smelling like roses :). How cool is that?

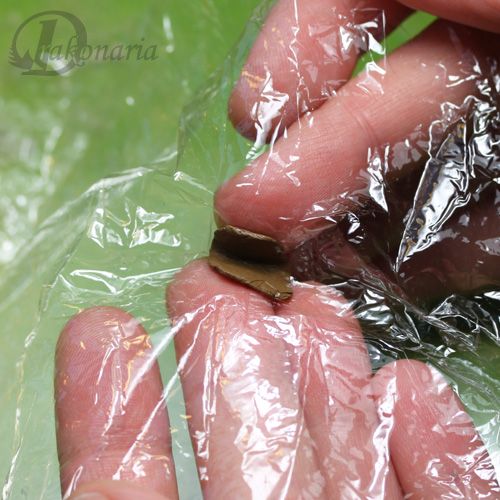
The clay was very moist, but it had a bit uneven texture so I kneaded it for a while. I decided that the best way was to make it through the foil it came in. I didn't know the texture of this clay yet and definitely didn't want to end up with all I had stuck to my fingers. This way I got totally not sticky, perfectly moistured, smooth clay very quickly and without any stress.


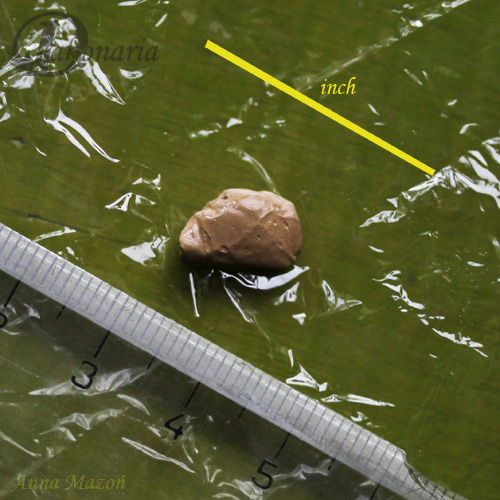
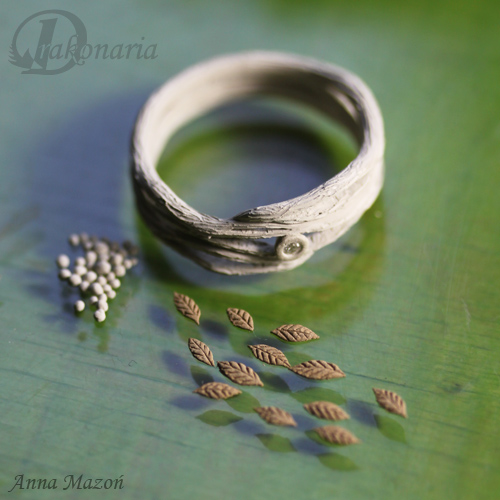
Here you can see the size of the batch I got (less than a half of regular batch). It's light brown, not green at all. It may be surprising, but this gold turns green during sintering process. It's Michelle's secret how does this exactly work :).

As you can see the batch isn't big. At least I thought so, until I started working with it. I know it may sound unbelievable, but it's actually a lot of clay. I was sure I would use all the clay I had for the first ring I wanted to make. But it turned out, that I used about 1/3 of the batch and made twelve, quite big leaves. Overall I made, out of this one 0.7 g batch, 26 leaves and 12 balls which I used in three projects, and I still have a tiny bit of the gold left. It is simply because when you work with so precious material, you rather work small and smart.


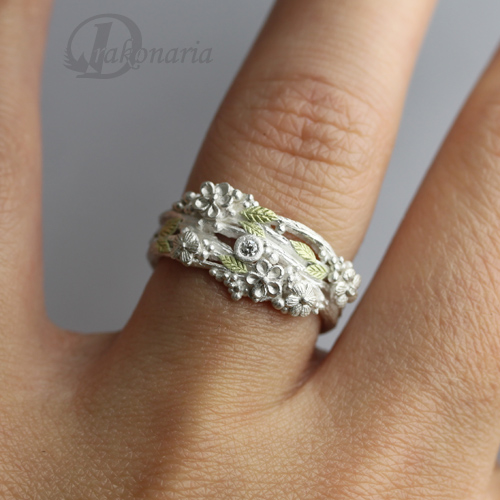
The first thing I wanted to make was a silver twig ring, with a diamond, some flowers and green gold leaves. It was a whole "for the first time" experience. I used here PMC3 (and I've never used any kind of PMC before - we only have Art Clay distributor here in Poland), for the first time fired a diamond and, last but not least, for the first time I used this 18 K green gold.
I just put everything together with silver paste. Yes, you can fire this green gold with silver, simply greenware to greenware. Just put all elements together with silver paste, but make sure not to stain with silver paste any gold surfaces that will be visible. The clay dries quite slowely and has great workability.

 Then I fired the ring. This gold can be fired in three different ways.
1. It can be torch fired, I haven't tried it though.
2. It can be fired in a kiln
3. It can be fired in a kiln in activated carbon

For this ring Michelle recommended the third option - firing in activated carbon - because of the diamond. It would be probably destroyed in any kind of open air firing. It is generally believed that fine silver clay needs to be fired in open air, but Michelle Glaeser found out that fine silver gets full shrinkage after 2 firings in carbon. She recommends 1505 ºF (818 ºC) for two hours, bring down to 200 ºF (circa 100 ºC), then fire again 1505 ºF for two hours.  This 1505 ºF is a minimum temperature for the green gold, but you can go higher. What can I say - it works.
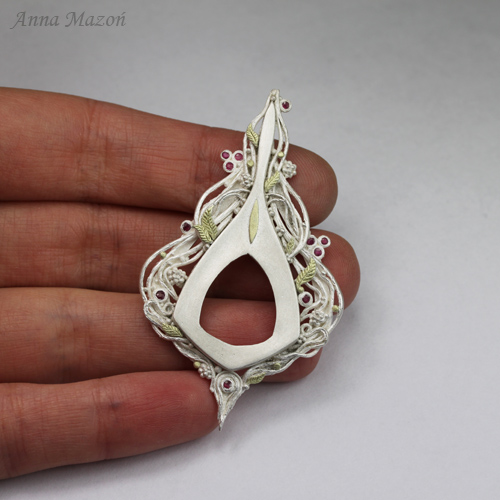
You can see in this photo how does green gold look like right after firing. It's already green - nice, light shade of green.


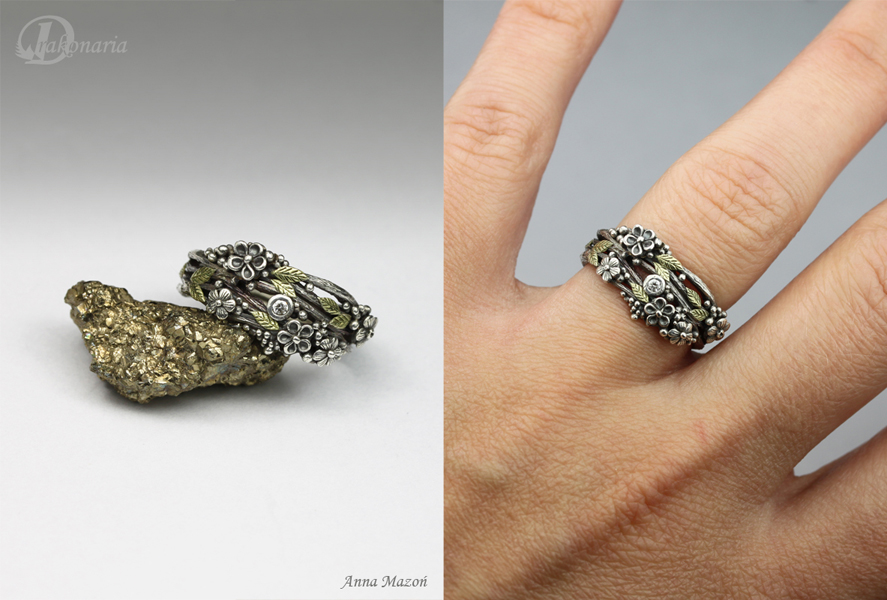
Here you can see, that, as expected, green gold doesn't react to LOS patina. It stays bright and clean against dark surface of oxidized silver.


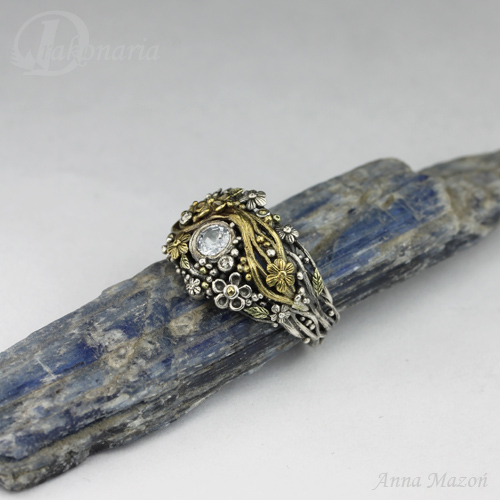
And here you can see how the ready ring looks like. I made one photo with a piece of pyrite, to show a difference in colour between this yellow gold tone of the stone and greener shade of green gold. It can be easily polished with any tools you use for silver.


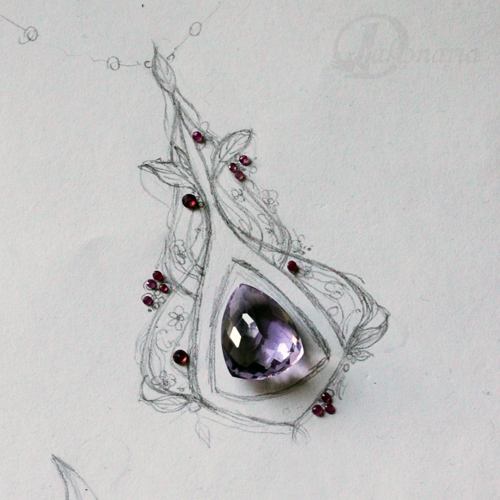
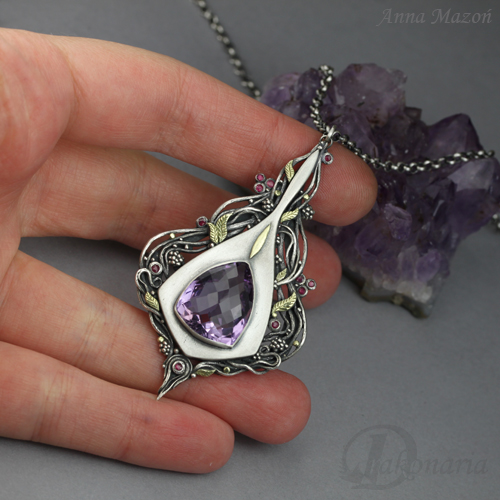
Then I decided to make something bigger, and more complicated. I made a rough sketch of an openwork pendant, a bit inspired by Art Nouveau, with faceted rubies, amethyst and green gold detailing (leaves, balls etc.).


Here you can see the pendant ready for firing. It had a lot more of green gold than the ring. I made some bigger leaves and balls. I had to work smart here and for example I flattened the balls to give them bigger, visible surface. Leaves are also made in a special way - they are green gold "doublets". I didn't want to make them too thick (it would be a waste of gold), so I paired them with silver leaves of exactly the same shape. I glued them together with silver paste, and added this strong, thick pieces to the pendant.


This time there was no need for carbon firing, so I fired the pendant simply in a kiln. I used generally the same firing schedule as previously, but went a little bit higher - 1540 ºF (838 ºC) for two hours, bring down to 200 ºF (circa 100 ºC), then fire again 1540 ºF for two hours.
The pendant came out of the kiln just perfect. You can see here again the shade of green gold right after firing.


I soldered a bezel for the amethyst and a jump ring, oxidized the piece, polished it partially and it was ready.


I'm pretty happy with the fact that this piece is both symmetrical and asymmetrical. I hope that this adds some movement and organic quality to the design. I named it "Once upon a time" ;). I'm still struggling with the chain... Maybe something else would be better. Originally I wanted to hang it on a strand of faceted amethysts, but it would be definitely too much.


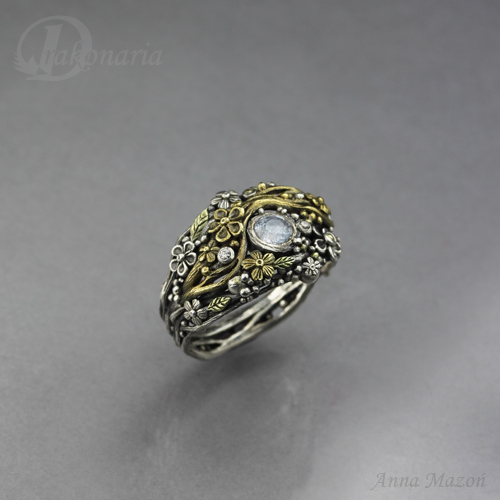
Here is the last piece I made with green gold. Actually there is only a small addition of green gold in this ring (just leaves and a few tiny balls). It also contains yellow gold (22 K Art Clay Gold), silver (PMC3), two diamonds and lovely pale sapphire. You can see here the difference between 22K yellow gold and 18K green gold. In the next post, dedicated to yellow gold, I'll show you a few photos I took while making this piece. It was really great mixed metals fun :).


 Like I said at the beginning, I really love this green gold clay by Michelle Glaeser. The final effect is simply fantastic and I appreciate the fact it can be fired in every possible way. It's also wonderful that it can be joined with silver  greenware to greenware. Basically it has fine silver's simplicity of usage, but it brings to a piece truly precious quality.

Here you can find Michelle's blog: http://rosegoldclay.blogspot.com/
And here you can buy the clay: http://www.etsy.com/shop/mfglaeser