Today a bit about my first trials with Quick-fire Steel by Hadar Jacobson. I bought a jar of this clay more than a year ago, and simply forgot about it lying in my drawer. Finally I had decided to use it a few months ago, made a ton of notes, as usually when I'm working with a new material, but haven't put them together till now. Generally I have mixed feelings. I feel I need some more trials and this clay can give me more, but I'm a bit reluctant to use it again. AND it seems this clay is replaced with the new Low Shrinkage Quick-fire Steel XT. But get down to the nitty-gritty (wooohooo, I learned a new idiom ;) ).
Just like in case of Goldie Bronze, Quick-fire Steel by Hadar Jacobson comes in a form of powder you have to mix with water to get workable clay. Well - you probably all know famous Hadar's Clay™ :) - so I won't write about all the basics - just what I think were the most interesting observations and conclusions for me. This was the first clay by Hadar Jacobson I've ever used. I generally love the idea of steel jewellery so was hoping for the best.
This clay is definitely a ferromagnetic material. Well, no wonder as it contains mostly iron, but it was SO cool to see this :). The majority of my steel tools are slightly magnetized, and look what was happening (these are pliers dipped in steel clay powder). Lovely - fluffy pliers ^^'. So, optionally, this clay can be used in a demonstration of magnetic field lines ;).
It was very easy to make pliable clay out of the powder, but the clay
ready for use is a bit messy. I mean - no matter how much olive oil I put
on my hands, no matter how I modified amount of water - I was still getting SO dirty in contact with this
clay. The clay itself is quite nice to the touch - very rich, creamy,
beautiful brownish black, but for some reason it irritated my skin (I
have to say here, as a side note - I have very sensitive skin, so it's probably
just me.). It felt like there were some scrubbing particles in there.
Besides that the clay is very nice to work with. It can be textured very easily, it's very pliable - basically I could make all things I usually do without any problems. I decided to make a few rings, a simple pendant and two test pieces.
Firing was the worst part of the whole process. I used high fire schedule for muffle kiln:
1st phase: ramp at 1000°C to 593°C
2nd phase in coconut shell-based carbon: ramp at 1000°C to 971°C, 2 h hold.
Firstly - my stainless steel firing container was heavily distorted after this firing. Secondly - the inside surface of my kiln's door got three ugly cracks (the sound was quite scary!), and finally - the carbon was full of ash (definitely more ash than I get when I'm firing BRONZclay, Goldie Bronze or COPPRclay, even though I used a lid (Hadar Jacobson recommends NOT to use a lid, but I simply couldn't believe that this was a right thing to do ;). I just left a gap between firing pan and the lid). Later I consulted girls from Etsy Metal Clay Team and they confirmed that firing without a lid actually works.
So - generally firing time is quite long (you need to wait for a kiln to cool down after the 1st phase) and the firing temperature seems to be too high for my kiln and my firing container to bear (I have Prometheus PRO-7/PRG kiln). I definitely wouldn't mind if the firing temperature was a bit lower.
What's the most important of course - everything came out of the kiln sintered. But some other issues appeared. All pieces that had any flat surfaces were very grainy (I have to write here though that Hadar Jacobson says in her Quick-fire Steel Instruction Manual that the surface of non-textured steel is a little grainy, so this wasn't something unexpected). Major distortions also appeared.
I tried to straighten distorted pieces, but it was simply impossible - this steel is SO hard. But look at the test pieces. Here is little flat piece with a small ball. Ball was attached perfectly - I couldn't take it off with anything. I tried filing the piece and it revealed nice silver colour beneath grey, grainy surface.
I wanted to bend a coil a bit to check if it has any elasticity, but it was too hard! I couldn't bend it at all. The only thing I finally achieved with a few tools and a lot of force was breaking it. So this steel seems to be very, very strong, yet totally not elastic. Later I tried to forge it a bit and this gave it some elasticity.
These are two twig rings I made using Quick-fire Steel. I finished them using felt polishing wheel with a bit of polishing paste. I love this shiny finish and colour. It looks a bit like platinum, but it's so lightweight that it also reminds chromium. It's darker than silver, more grey and shinier. These rings weren't distorted in any way. Generally they survived firing just fine. Stones are cubic zirconias fired in place. If all pieces made of this clay fired so well I would be huge fan of it.
Here you can see better this beautiful mirror shine.
I also made a flat, rectangular ring and it turned out to be a total disaster. After firing it was heavily distorted. Rectangle shape wasn't rectangle anymore, the hole wasn't round - I had to make a lot of filing to make it look this way you see in the photo (and it still isn't perfectly rectangular). I also had to file down big grains that appeared on screws.
The last thing I made in this firing was a small, flat pendant with a lot of ornaments. I was totally not happy with it. The pendant wasn't flat anymore, everything was grainy, and the back of the pendant was very uneven. I tried to file it, but I gave up - it wasn't worth that much work.
It turned out I had a lot of clay left with water already added, so I covered it with olive oil, wrapped in plastic and planned to work with it the following day. Unfortunately in the morning I saw traces of rust in it, so decided to throw it away and make another portion. So it seems this clay, when mixed with water, has very short shelf life. No wonder - it isn't stainless steel after all. This rust thing inspired me to make one more trial, this time with rust added deliberately. I created a set of three rings and made second firing (this time firing temperature was 10 °C lower - I was hoping for less distortion and less grainy texture, but this didn't change anything - so again a lot of filing to make the holes round. At least this grainy texture works quite well here.).
Wonderful Jane Font gave me a recipe for making rust on steel. She told me to add some salt and vinegar to warm water, dip my pieces in it and let them dry. I wanted to speed up the process even more, so after dipping my pieces I put them into the kiln, which was still a bit warm after firing. It worked extremely fast. Here is the other side of the rings.
I know that rusting is an ongoing process, but it doesn't matter in case of these rings. To be honest they were not meant to be worn. They were made for a quite prestigious Polish contest, and now they are in an exhibition :).
So, generally, like I said, I have mixed feelings. I had some problems with this clay, but I love it's colour, possibilities of finishing and it's price ;). This grainy texture, which I don't like at all, will look very well on projects that are deliberately rough, very organic or tribal. I totally see possibilities of using it, but I prefer having more control over textures that appear on my projects. I would also love to have steel clay with slightly lower firing temperature. My poor kiln still works well, so nothing bad happened, but I was really stressed out ;). Maybe I'll use it again one day (I still have a half of a jar). I'm quite tempted to try this new Low Shrinkage Quick-fire Steel XT. Lower shrinkage should mean less distortion.
I also have another Hadar's Clay™ lying in my drawer and waiting to be used - white bronze. I hope I'll try it soon.
Wednesday, October 31, 2012
Monday, October 8, 2012
Flower storm
I'm so happy that one of my pieces got into Holly Gage's calendar :). It's the second time my work is published in this wonderful publication. This year it's my "Flower storm" necklace. I made it of Goldie Bronze, sterling silver and SO beautiful, blue-green labradorite. It was so much fun making it. Actually I think this was my biggest metal clay piece ever. It barely fitted my firing pan ;). Surprisingly I had totally no problems with firing it, so it was another successful trial with Waldo Iłowiecki's bronze.
It began as a sketch. I just drew a rough idea of the design around the stone. I have quite big collection of labradorite cabochons, and that day this one seemed to be particularly inspiring. I saw a storm inside it :) and wanted to use it in a dynamic, intricate design. I wanted to make something really big and openwork.
I formed the base of the necklace out of twig-like textured, thin coils. I like working on plexiglass, because I can put my sketches under it and they are still visible. This way I can easily use a sketch as a very accurate reference.
Then I added tiny balls and flowers...
...and decided that it would be nice to make two smaller elements, connecting the main part of the necklace with a chain I wanted to add later. I also added a plain "arch" to create nice contrast between rich organic ornaments and smooth, shiny surface.
Then I fired the piece ( I used the firing schedule I described in my post about Goldie Bronze™), made a soldered bezel cup for the stone and attached it to the main part. I added a few jump rings and a chain. The last thing to do was to slightly bend the necklace, to make it fit nicely a curvature of wearer's neckline. This bronze is really strong, so it wasn't a problem at all.
The same week I made also two other pieces similar in style. The first one was a "Flower storm" bangle, also with a labradorite cab. I wanted to check if it's possible to make strong and secure prong setting using Goldie Bronze. Totally positive. The second piece was a pair of earrings, adorned with flat, black pearls. It was quite tricky to make one earring look like a mirror image of another one, but I succeeded... more or less ;).
Well, enough about bronze for now. Recently I'm working with another wonderful material - green gold clay by Michelle Felice Glaeser! I also finally used my package of Art Clay 22K yellow gold clay ( I had it for 3 years ;D and it was still moist and pliable!). I'll write more about it soon :).
Saturday, September 22, 2012
"Herbarium" openwork pendant workshop
I have really wonderful news to share :). Next year I'll teach a class on my openwork "Herbarium" pendants in Lynne Glazzard's workshop in beautiful Yorkshire, UK. The class will take place on 11th and 12th May 2013. You can find all the information here, on Metal Clay North website.
So, if you like my work, would like to learn something from me, but Poland is too far, maybe UK is an option to check out :).
This is an offcial description of the workshop:
"In this class you will learn to make an openwork, romantic pendant, adorned with a bezel set stone and precise, tiny ornaments. You will use silver clay to create lacy, yet strong and secure constructions, which you’ll decorate with extremely detailed tiny leaves, flowers, forest fruits or other ornaments of your choice. You will also learn to make a box like, elevated base for a stone and set it in a bezel setting. All these skills can be easily adapted to your own style, merged with your favourite techniques and used with different metal clays. Openwork designs are wonderful response to increasing silver prices, allowing you to save on material, but not on the quality of your works. Some previous silver clay experience is necessary."
And here are a few bigger projects I made using this technique:
I hope it's tempting ;). I'm very excited about teaching in Lynne Glazzard's studio. And, if UK is still too far, you can always check my tutorials in my Etsy shop :).
P.S. I'll also teach this class in Poland soon. More news coming.
So, if you like my work, would like to learn something from me, but Poland is too far, maybe UK is an option to check out :).
This is an offcial description of the workshop:
"In this class you will learn to make an openwork, romantic pendant, adorned with a bezel set stone and precise, tiny ornaments. You will use silver clay to create lacy, yet strong and secure constructions, which you’ll decorate with extremely detailed tiny leaves, flowers, forest fruits or other ornaments of your choice. You will also learn to make a box like, elevated base for a stone and set it in a bezel setting. All these skills can be easily adapted to your own style, merged with your favourite techniques and used with different metal clays. Openwork designs are wonderful response to increasing silver prices, allowing you to save on material, but not on the quality of your works. Some previous silver clay experience is necessary."
And here are a few bigger projects I made using this technique:
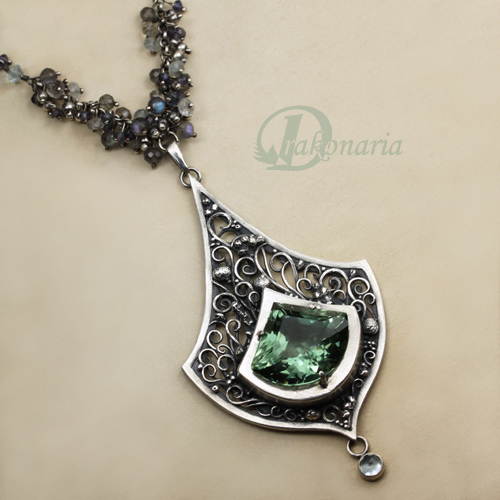
| "Herbarium - Misty Morning" - silver, green quartz, topaze |
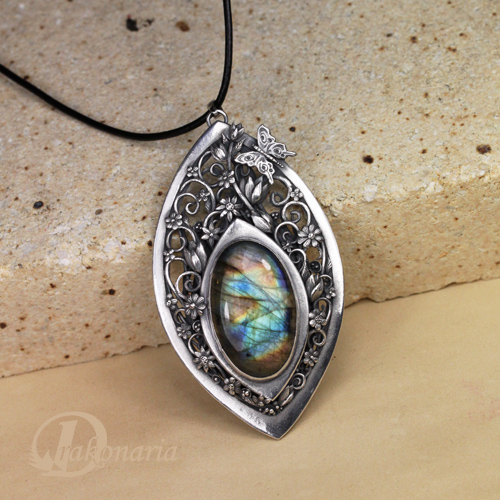
| "Herbarium - spring rainbow" - ACS silver and labradorite |
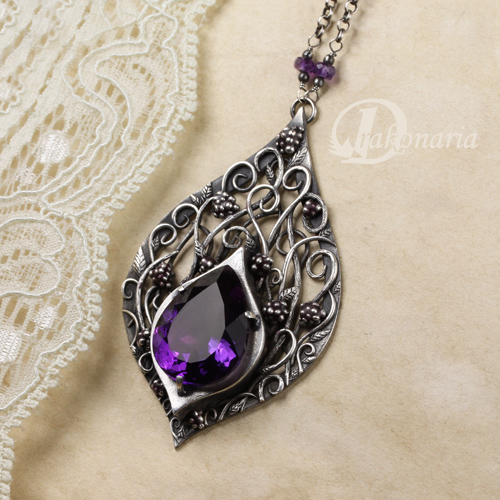
| "Herbarium - blackberry" - ACS silver and amethyst |
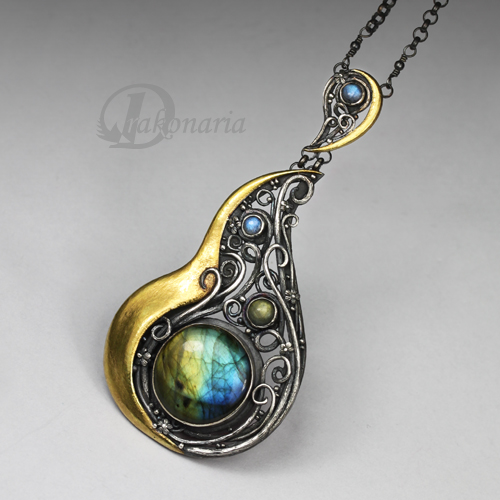
| "Herbarium - summer scent" - silver, 22 K gold, labradorites |
| "Herbarium - forest flame" - fine silver and labradorite |
| "Herbarium - forest fruits" - silver, amethyst and garnet |
| "Herbarium - raspberry" - bronze ring with garnet |
| "Herbarium - gold vines" - bronze and olivine |
P.S. I'll also teach this class in Poland soon. More news coming.
Saturday, September 15, 2012
Sol omnia regit
Yesterday was a really WONDERFUL day :). I found out that I'm Metal Clay Artist Magazine cover girl!! My "Sol omnia regit" pendant is on the cover of the magazine's newest issue. It's really hard to believe. I'm unbelievably honoured and thankful to the whole MCAM crew, especially to wonderful Jeannette Froese LeBlanc and Julia Rai. I knew that there would be my "Artist Profile" in this issue, but to the last moment I had no idea what was going to be on the cover. This was the best surprise ever :).
I was also surprised by this "Architect of Poland's Metal Clay Movement" cover tag line :D. I'm definitely not any architect of anything, but of course I feel very flattered :). Thank you! It's totally true though, that there are a lot of extremely talented metal clay artists here in Poland. Check Anna Fidecka, Ksenia Ścieszka, Marta Grzywna, Waldo Iłowiecki and many others (links on the right column). Really worth seeing.
And here is the pendant "without" the cover. It's made of fine silver (ACS), sterling silver and two golden labradorites. Labradorites are my favourite stones - I use them very frequently in my jewellery and have quite a big collection of rough specimens :). I just love how they play with light.
And here is a short story of this pendant :). Firstly I built general shape of the pendant. Then I added place for a stone. It was hold in place by four "sticks" which became bases I built trees on. I started to take photos exactly that moment, so I don't have any pics showing previous stages :(.
Each tree was built step by step, by adding and shaping thin coils of clay. I wanted the branches and roots of each tree to be connected with those of other trees.
You can see in this photo that at this stage I thought up the name for this pendant :) - "Sol omnia regit" which is "The Sun rules over everything" in Latin. I knew from the beginning that this pendant would be solar themed piece (it has a form of stylized solar cross after all), but I couldn't find the right name.
When the trees were ready I filed trunks a bit to give them more solid look. I also created a bark texture and strengthened up the whole construction with thick paste.
I made sure that all branches were well attached and back of the pendant covered everything that might catch on cloth (while being worn). I added bark texture to the trunks and slighlty smoothened the whole back with abrasive pad. I love the finish abrasive pads leave on greenware metal clay. I use them a lot.
Then I made a few dozen of tiny leaves and attached them to the trees. I generally love making tiny ornaments. Tiny leaves, tiny flowers, tiny berries, tiny-everything :). The pendant was ready for firing.
After firing I prepared bezels for two stones I wanted to use.
I soldered the bigger bezel to the center of the pendant and smaller one to a little circle I cut out of sterling silver sheet. Then I soldered a few jump rings to the smaller bezel cup and soldered the whole thing to the pendant.
Then I cleaned the pendant with flux residue remover, oxidized it, set both stones, polished it and the pendant was ready :).
As I mentioned above this pendant is a stylized solar cross - very old symbol used in many, many cultures. Four trees symbolize Nature ruled by the Sun - golden labradorite - which gives them energy to live and grow. Solar cross has four arms (in my version four trees) as there are two equinoxes and two solstices which form the whole solar year :).
Well... That's all I think :).
Did I mention that I'm SOOOO happy? :D
That's really all now ;).
P.S. I haven't seen the content of this newest Metal Clay Artist Magazine issue yet, but I've already heard it's SUPER hot :). I cannot wait to see it! :)
I was also surprised by this "Architect of Poland's Metal Clay Movement" cover tag line :D. I'm definitely not any architect of anything, but of course I feel very flattered :). Thank you! It's totally true though, that there are a lot of extremely talented metal clay artists here in Poland. Check Anna Fidecka, Ksenia Ścieszka, Marta Grzywna, Waldo Iłowiecki and many others (links on the right column). Really worth seeing.
And here is the pendant "without" the cover. It's made of fine silver (ACS), sterling silver and two golden labradorites. Labradorites are my favourite stones - I use them very frequently in my jewellery and have quite a big collection of rough specimens :). I just love how they play with light.
And here is a short story of this pendant :). Firstly I built general shape of the pendant. Then I added place for a stone. It was hold in place by four "sticks" which became bases I built trees on. I started to take photos exactly that moment, so I don't have any pics showing previous stages :(.
Each tree was built step by step, by adding and shaping thin coils of clay. I wanted the branches and roots of each tree to be connected with those of other trees.
You can see in this photo that at this stage I thought up the name for this pendant :) - "Sol omnia regit" which is "The Sun rules over everything" in Latin. I knew from the beginning that this pendant would be solar themed piece (it has a form of stylized solar cross after all), but I couldn't find the right name.
When the trees were ready I filed trunks a bit to give them more solid look. I also created a bark texture and strengthened up the whole construction with thick paste.
I made sure that all branches were well attached and back of the pendant covered everything that might catch on cloth (while being worn). I added bark texture to the trunks and slighlty smoothened the whole back with abrasive pad. I love the finish abrasive pads leave on greenware metal clay. I use them a lot.
Then I made a few dozen of tiny leaves and attached them to the trees. I generally love making tiny ornaments. Tiny leaves, tiny flowers, tiny berries, tiny-everything :). The pendant was ready for firing.
After firing I prepared bezels for two stones I wanted to use.
I soldered the bigger bezel to the center of the pendant and smaller one to a little circle I cut out of sterling silver sheet. Then I soldered a few jump rings to the smaller bezel cup and soldered the whole thing to the pendant.
Then I cleaned the pendant with flux residue remover, oxidized it, set both stones, polished it and the pendant was ready :).
As I mentioned above this pendant is a stylized solar cross - very old symbol used in many, many cultures. Four trees symbolize Nature ruled by the Sun - golden labradorite - which gives them energy to live and grow. Solar cross has four arms (in my version four trees) as there are two equinoxes and two solstices which form the whole solar year :).
Well... That's all I think :).
Did I mention that I'm SOOOO happy? :D
That's really all now ;).
P.S. I haven't seen the content of this newest Metal Clay Artist Magazine issue yet, but I've already heard it's SUPER hot :). I cannot wait to see it! :)
Friday, September 7, 2012
Hinges, lockets etc.
The lid of the locket is made entirely out of hand formed fine silver (Art Clay Silver) (these sylvan ornaments are one of my favourites), but the rest of the locket is made out of traditional sterling silver. There was a lot of soldering, swearing, growling and even a few tears ;), but finally I finished it, and I'm SO happy :).
Before I began working on this pendant I had found a few wonderful online tutorials which turned out to be very useful. If you know nothing about soldered hinges, like I did (and probably still do :) ), check them out:
- Tutorial on Etsy Metal Blog
- Mokume gane locket on makingjewellery.com
- Modern lockets on ganoskin.com
This is how the locket looks like when it's closed. What was the most difficult thing? Definitely soldering these tiny pieces of tubing to both parts of the locket. At first I did of course what I was warned about - I soldered all "knuckles" to one side ;). During soldering process all tubing pieces are put on one stainless steel wire so it's really easy to let the solder flow too fast... This was SO frustrating. At some point I also managed to solder steel wire to the inner surface of the silver hinge... I had no idea this was even possible ;D. Next time I totally want to try riveting the wire which is put inside the hinge, but firstly I have to buy a jewellers anvil. This time I simply made at the one end a tiny ball with my gas torch, and then soldered another tiny ball to opposite end.
And this is the locket on my hand :). It's rather small. The stones are chrome diopside and two yellow sapphires. To be honest I feel so encouraged that I'm thinking about making one for myself. This may be surprising, but I don't have any jewellery made by me. Maybe such a locket could be the first piece I would wear :).
And a bit of history ;D. This is a locket I made back in 2008 - this was the year I tried metal clay for the first time. I still have this pendant, but I don't wear it (believe me, it is SO askew and it keeps opening by itself when it's being worn... Here are some more photos ;) ). It's just a souvenir from my metal clay beginnings :). Actually the design of this locket you see above is based on this old one. Many things happened since then and I really learned a lot :).
P.S. Make sure you check the newest post on Etsy Metal Clay Team blog :). Our super talented team members present their latest creations.
Friday, August 10, 2012
Test of Goldie Bronze ™
This is a really long post, but I hope that it may be useful for someone :). A few months ago I had an opportunity to try for the first time Waldo Iłowiecki's new bronze clay - Goldie Bronze ™. While working with it I made a ton of notes and photos, so I decided to write something more about it here.
Goldie Bronze ™ comes in two types of powder - soft and hard. It contains approximately 90% copper and 10% tin. I tested the first one so far. Soon I'll test hard type also.
When you open a container the clay looks like this. I was quite surprised when I saw this white powder not entirely mixed with brown powder, but now I know this totally doesn't matter. You just have to jumble it up a bit.
Similar like in the case of Hadar's clays, you have to add water to the powder to get workable clay. Many people stress that you should use distilled water, but I'm fortunate enough to have tap water which works great with all types of clays. You can see in the photo that I added far too much water - the clay doesn't look too pretty at this stage ;). You can already see that the colour of Goldie Bronze ™ is quite light. It's like café au lait ;).
Waldo stressed in an instruction I get from him, that to get smooth consistency, the clay should be kneaded very well, and the best way is to roll it thinly and fold it over several times, then roll again, fold over etc. As you could see above, my clay was far too wet, so each time I rolled it I let it dry for a while. This way it lost surplus water quite quickly.
Generally I had no problems with getting smooth, nice and totally not sticky constistency. It was my first trial with clay in a powder form and I was afraid that making workable clay out of it would take ages and I would have a lot of problems. I was nicely surprised than it wasn't too painful :). At this stage I already noticed that this clay is totally different to the touch than other clays I've tried. It's a bit velvety, a bit like something made of silicone. This is actually very nice, because you REALLY don't need olive oil or any other hand conditioner to work with it.
Then I actually begun working. I decided to make three pieces, each for different purpose:
- flat pendant with sculpted tree - I wanted to see if this clay is appropriate for very detailed, hand sculpted work I usually do.
- twig ring - I wanted to check how does this clay work when used to make thin, open work, carved pieces, what is its shrinkage rate in case of rings, how would zirconia fired in place react.
- 3 dimensional triquetra pendant (it's a box with an open back - it's not visible well in this photo) - I wanted to check if schrinkage is the same in all directions (it's, for me, the biggest problem with Metal Adventure's BRONZclay™), I wanted to check how does this clay work with molds (I used here a mold made from a pendant I made once in silver).
I also made three test pieces to destroy after firing - thin coil, flat circle (3 cards thick) and flattened ball (approximately 5 mm thick).
Goldie Bronze ™ is definitely very pliable, very soft, even a bit "loose" (that's why there are two versions - soft and hard which can be mixed together if needed). It's surely PERFECT for molds. Working with it was very pleasant, especially the fact that I didn't have to use hand conditioner. This clay is so unsticky, that there were even a few moments I had an impression of it sliding on my fingertips and on my working surface - it can be a problem when you make for example very thin coils and you need some friction. But as you can see above it isn't something that can't be overcome when you know this clay better. It is also a bit "sandy" - if you have very good sight you can see its sandstone-like structure, especially when it's dried. Look at this macro photo. Despite this it can be smoothened quite easily with sand-paper, abrasive pad etc. While working you can easily make paste out of a bit of clay, but you can also use water alone - it joins elements together as well.
Goldie Bronze ™ needs to be fired in two stages. First to burn out the binder and the second one to actually sinter metal particles.
- First stage - place the pieces in a stainless steel firing container on a layer of activated carbon. Put it without a lid into a kiln and fire at full ramp to 350°C (662°F). Hold for 30 minutes.
- Second stage - remove the container from the kiln and fill it with a layer of coconut shell-based carbon to cover the pieces. Cover the container with a stainless steel lid and place it back into the kiln (just after taking it out - don't cool down the kiln, just continue with second stage immediately). Waldo recommends at this stage firing full ramp to 820°C (1508°F) and hold for 40 minutes. I slightly modified this stage* and usually fire 800°C for 20 minutes and 825°C for 40 minutes. You can calculate that total firing time is relatively short - with the original schedule it is under 2 ½ hours! As you can see I had no problems with this first firing - all pieces came out of the kiln undistorted, fully sintered and covered with beautiful kiln patinas (unfortunately these patinas aren't durable :( and if not sealed, they turn orangey-yellow in a few weeks).
Then I polished half of one of my test pieces - you can see here the colour of polished Goldie Bronze ™. It's very nice - bright gold. Lighter than colour of BRONZclay™ which is rich, deep gold (I love it also :) ). Goldie Bronze ™ is a bit more silver-ish and tarnishes a bit slower (yay!). Fired pieces are surprisingly lightweight (at first I thought that maybe something went wrong during this first firing, but this is simply a feature of this clay). This is great, when making earrings - you can make quite big forms and they still will be wearable. And another great thing - Goldie Bronze ™ has very low shrinkage rate - my pieces shrank less than 6%! From wonderful test by Pat Waddington I know that Goldie Bronze ™ can shrink much more (12%) when fired significantly longer and hotter (second phase with 2 hours hold), but with lower shrinkage it's still VERY strong (just look below).
After this I worked a bit with my test pieces. As you can see in the photo I bent my thin coil into a little ring - without any breakage. Actually I was quite surprised. Then I tried to wad my flat circle, but I wasn't able to do it - I'm not strong enough. Finally my partner waded it using some tools. Again no breakage. Then I cut in half this flattened ball, to check if it's fully sintered inside - everything was ok (some darker spots are visible due to rough cutting surface). It seems that the clay is very strong yet quite elastic.
I felt quite encouraged by all these results so I decided to make something more complicated what would be really hard test for this clay. I made delicate, open work bangle with tiny flowers. I was quite happy with how it looked like so I was really hoping for easy firing. After the first stage the clay is supposed to turn black, but I saw the bangle's bottom part was still quite light. I thought I should flip it over and repeat stage one. Well - it was the worst idea ever. While flipping, the bangle accidentally hit the wall of my firing container and the piece broke into a few pieces... So - NEVER move your pieces at this stage - let them be. Now I know that lighter colour after the first stage of firing is not a problem at all. I tried to take the bangle out of the container and repair it with fresh clay, but this was SO stressful! If I touched anything too hard it broke. Goldie Bronze ™ in this "black clay" form after the first stage of firing is EXTREMELY brittle - you can easily make a black powder out of it between your fingertips, so really be careful and don't touch it if you don't have to.
After repairing the bangle I fired it again (I repeated both stages of firing), and it developed one big crack (actually it was quite surprising that only one, after being broke into so many pieces...), but the rest of the bangle sintered properly and places of repair were not visible.
I repaired this crack with fresh clay and fired it again. Due to this "sandy" structure, I mentioned earlier, it is very easy to join fired elements with fresh clay - it "penetrates" fired surface and sticks to it very well. You definitely don't need oil paste or something like this - fresh clay and water based paste is enough. These joinings are very strong - I tested it later.
So generally - thanks to this accident I had a chance to check repairing of Goldie Bronze ™ after both stages of firing. In both stages it is totally possible to repair your piece with fresh clay or paste, but after the first stage (when the binder is burnt out, but metal particles are not sintered yet) it is simply more difficult due to brittleness of the clay.
This is how the bangle finally looked like. I decided to polish it only partially. It already found its new owner :). It came out quite interesting and very, very strong.
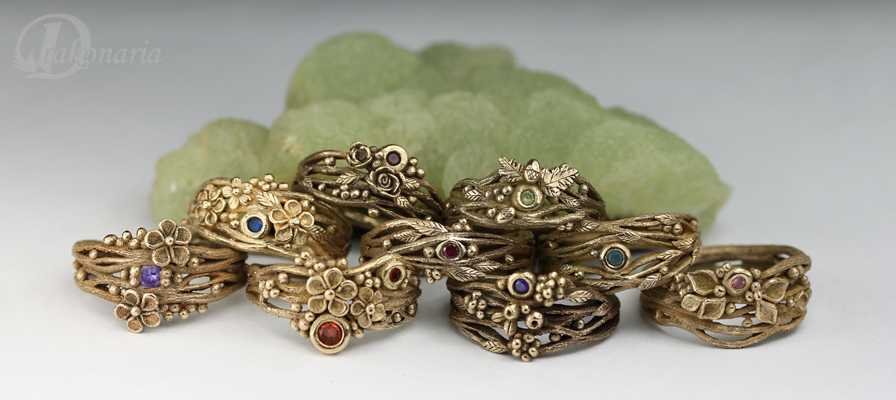
Here you can see a few more pieces I made with Goldie Bronze ™. A few "twig" rings with zirconias. They shrank about one European size.
A bangle where I joined this bronze with Art Clay Silver (I fired the bronze part firstly and then added silver vines).
Goldie Bronze ™ comes in two types of powder - soft and hard. It contains approximately 90% copper and 10% tin. I tested the first one so far. Soon I'll test hard type also.
When you open a container the clay looks like this. I was quite surprised when I saw this white powder not entirely mixed with brown powder, but now I know this totally doesn't matter. You just have to jumble it up a bit.
Similar like in the case of Hadar's clays, you have to add water to the powder to get workable clay. Many people stress that you should use distilled water, but I'm fortunate enough to have tap water which works great with all types of clays. You can see in the photo that I added far too much water - the clay doesn't look too pretty at this stage ;). You can already see that the colour of Goldie Bronze ™ is quite light. It's like café au lait ;).
Waldo stressed in an instruction I get from him, that to get smooth consistency, the clay should be kneaded very well, and the best way is to roll it thinly and fold it over several times, then roll again, fold over etc. As you could see above, my clay was far too wet, so each time I rolled it I let it dry for a while. This way it lost surplus water quite quickly.
Generally I had no problems with getting smooth, nice and totally not sticky constistency. It was my first trial with clay in a powder form and I was afraid that making workable clay out of it would take ages and I would have a lot of problems. I was nicely surprised than it wasn't too painful :). At this stage I already noticed that this clay is totally different to the touch than other clays I've tried. It's a bit velvety, a bit like something made of silicone. This is actually very nice, because you REALLY don't need olive oil or any other hand conditioner to work with it.
Then I actually begun working. I decided to make three pieces, each for different purpose:
- flat pendant with sculpted tree - I wanted to see if this clay is appropriate for very detailed, hand sculpted work I usually do.
- twig ring - I wanted to check how does this clay work when used to make thin, open work, carved pieces, what is its shrinkage rate in case of rings, how would zirconia fired in place react.
- 3 dimensional triquetra pendant (it's a box with an open back - it's not visible well in this photo) - I wanted to check if schrinkage is the same in all directions (it's, for me, the biggest problem with Metal Adventure's BRONZclay™), I wanted to check how does this clay work with molds (I used here a mold made from a pendant I made once in silver).
I also made three test pieces to destroy after firing - thin coil, flat circle (3 cards thick) and flattened ball (approximately 5 mm thick).
Goldie Bronze ™ is definitely very pliable, very soft, even a bit "loose" (that's why there are two versions - soft and hard which can be mixed together if needed). It's surely PERFECT for molds. Working with it was very pleasant, especially the fact that I didn't have to use hand conditioner. This clay is so unsticky, that there were even a few moments I had an impression of it sliding on my fingertips and on my working surface - it can be a problem when you make for example very thin coils and you need some friction. But as you can see above it isn't something that can't be overcome when you know this clay better. It is also a bit "sandy" - if you have very good sight you can see its sandstone-like structure, especially when it's dried. Look at this macro photo. Despite this it can be smoothened quite easily with sand-paper, abrasive pad etc. While working you can easily make paste out of a bit of clay, but you can also use water alone - it joins elements together as well.
- First stage - place the pieces in a stainless steel firing container on a layer of activated carbon. Put it without a lid into a kiln and fire at full ramp to 350°C (662°F). Hold for 30 minutes.
- Second stage - remove the container from the kiln and fill it with a layer of coconut shell-based carbon to cover the pieces. Cover the container with a stainless steel lid and place it back into the kiln (just after taking it out - don't cool down the kiln, just continue with second stage immediately). Waldo recommends at this stage firing full ramp to 820°C (1508°F) and hold for 40 minutes. I slightly modified this stage* and usually fire 800°C for 20 minutes and 825°C for 40 minutes. You can calculate that total firing time is relatively short - with the original schedule it is under 2 ½ hours! As you can see I had no problems with this first firing - all pieces came out of the kiln undistorted, fully sintered and covered with beautiful kiln patinas (unfortunately these patinas aren't durable :( and if not sealed, they turn orangey-yellow in a few weeks).
Then I polished half of one of my test pieces - you can see here the colour of polished Goldie Bronze ™. It's very nice - bright gold. Lighter than colour of BRONZclay™ which is rich, deep gold (I love it also :) ). Goldie Bronze ™ is a bit more silver-ish and tarnishes a bit slower (yay!). Fired pieces are surprisingly lightweight (at first I thought that maybe something went wrong during this first firing, but this is simply a feature of this clay). This is great, when making earrings - you can make quite big forms and they still will be wearable. And another great thing - Goldie Bronze ™ has very low shrinkage rate - my pieces shrank less than 6%! From wonderful test by Pat Waddington I know that Goldie Bronze ™ can shrink much more (12%) when fired significantly longer and hotter (second phase with 2 hours hold), but with lower shrinkage it's still VERY strong (just look below).
After this I worked a bit with my test pieces. As you can see in the photo I bent my thin coil into a little ring - without any breakage. Actually I was quite surprised. Then I tried to wad my flat circle, but I wasn't able to do it - I'm not strong enough. Finally my partner waded it using some tools. Again no breakage. Then I cut in half this flattened ball, to check if it's fully sintered inside - everything was ok (some darker spots are visible due to rough cutting surface). It seems that the clay is very strong yet quite elastic.
I felt quite encouraged by all these results so I decided to make something more complicated what would be really hard test for this clay. I made delicate, open work bangle with tiny flowers. I was quite happy with how it looked like so I was really hoping for easy firing. After the first stage the clay is supposed to turn black, but I saw the bangle's bottom part was still quite light. I thought I should flip it over and repeat stage one. Well - it was the worst idea ever. While flipping, the bangle accidentally hit the wall of my firing container and the piece broke into a few pieces... So - NEVER move your pieces at this stage - let them be. Now I know that lighter colour after the first stage of firing is not a problem at all. I tried to take the bangle out of the container and repair it with fresh clay, but this was SO stressful! If I touched anything too hard it broke. Goldie Bronze ™ in this "black clay" form after the first stage of firing is EXTREMELY brittle - you can easily make a black powder out of it between your fingertips, so really be careful and don't touch it if you don't have to.
After repairing the bangle I fired it again (I repeated both stages of firing), and it developed one big crack (actually it was quite surprising that only one, after being broke into so many pieces...), but the rest of the bangle sintered properly and places of repair were not visible.
I repaired this crack with fresh clay and fired it again. Due to this "sandy" structure, I mentioned earlier, it is very easy to join fired elements with fresh clay - it "penetrates" fired surface and sticks to it very well. You definitely don't need oil paste or something like this - fresh clay and water based paste is enough. These joinings are very strong - I tested it later.
So generally - thanks to this accident I had a chance to check repairing of Goldie Bronze ™ after both stages of firing. In both stages it is totally possible to repair your piece with fresh clay or paste, but after the first stage (when the binder is burnt out, but metal particles are not sintered yet) it is simply more difficult due to brittleness of the clay.
This is how the bangle finally looked like. I decided to polish it only partially. It already found its new owner :). It came out quite interesting and very, very strong.
Here you can see a few more pieces I made with Goldie Bronze ™. A few "twig" rings with zirconias. They shrank about one European size.
A bangle where I joined this bronze with Art Clay Silver (I fired the bronze part firstly and then added silver vines).
And some more twig rings (I love making them ;) ). I tested here different types of finishing. You can find some of the techniques I used here in my tutorials in my Etsy shop.
Generally I really like this clay. It's very easy to work with (easy repairing after firing is simply wonderful thing) and it is quite different than other bronze clays. Definitely interesting experience. To be honest I totally switched to this bronze clay since I tried it. It has it's cons, but it's the best I've tried so far. I know. This sounds like advertising ;D.
* You ask why I modified the second stage of firing. I made this change firstly
because I made also a few very big pieces (I haven't shown them anywhere yet - surprise is coming ;) ) and I wanted to be sure that the heat would reach inside
the pieces (that's why I made this additional 800°C preparation for 20 min) and then I fired
for recommended 40 minutes, in 825°C not in 820°C simply because the firing range of Goldie is quite wide and with 5°C more I'm just on the safe side. The
original schedule also works very well. Goldie Bronze ™ creator - Waldo Iłowiecki - uses the original schedule to fire his big, sturdy bracelets and
everything is ok. I'm just overly cautious and want to be really sure
that everything will be properly sintered.
By the way - check great test of this bronze by Sabine Alienor Singery. There is version for English and French speakers :).
Subscribe to:
Posts (Atom)